Project Overview
Insulating your garage door yourself is one of the most rewarding weekend projects for Canadian homeowners. With basic tools and a pre-cut kit, you can reduce energy bills, make your garage more comfortable, and protect your vehicles from extreme temperatures—all while saving $100-200 in professional labor costs.
Tools and Materials Needed
🔧 Tools
- Tape measure
- Utility knife with fresh blades
- Straight edge or T-square (4 ft)
- Work gloves
- Safety glasses
- Marker or pencil
- Step ladder
📦 Materials
- Pre-cut insulation kit OR foam sheets
- Construction adhesive (PL300)
- Retainer clips (if not included)
- Weatherstripping tape (optional)
- Dust cloths for cleaning
Choosing Your Insulation
Pre-Cut Kits ($80-150): Includes panels sized for standard 16×7 or 8×7 doors, plus retainer clips. Faster to install but may not fit non-standard doors perfectly. Available at Home Depot, Lowe's, and Amazon.ca.
Foam Sheets ($40-80): Buy 4×8 foot polystyrene (EPS) or polyisocyanurate sheets and cut to fit. More work, but cheaper and allows for perfect custom fit. Requires construction adhesive.
Step-by-Step Installation
Measure Each Door Panel Section
Your garage door has 4-5 horizontal panels, each divided into smaller sections by vertical rails. Measure the internal width and height of each cavity where insulation will go. Important: sections may vary in size, so measure each one individually. Write down all measurements.
Clean Door Surfaces
Use a damp cloth to wipe down the interior surface of each panel section. Remove dust, cobwebs, dirt, and any oily residue. This is critical if using adhesive—dirty surfaces cause panels to fall off. Let surfaces dry completely (10-15 minutes) before proceeding.
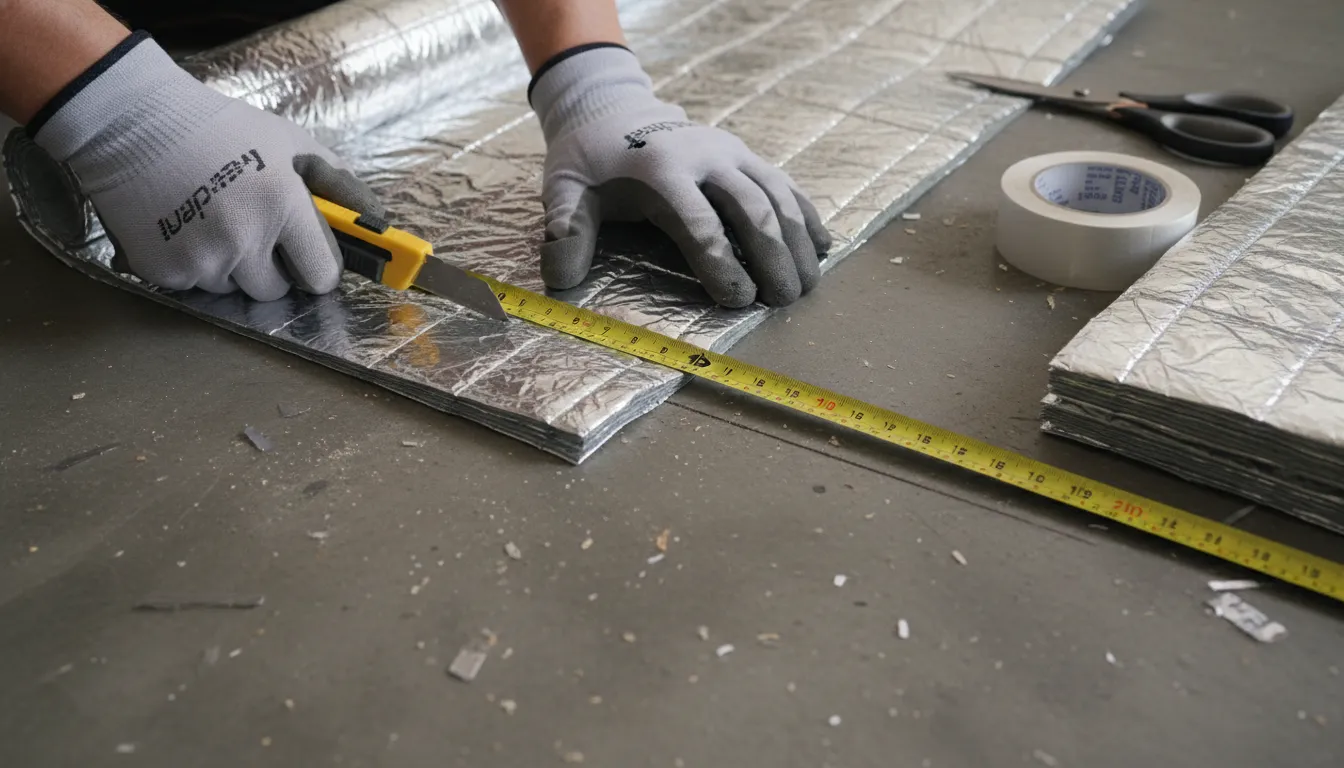
Cut Insulation Panels to Size
For each section, subtract 1/4 inch from both width and height measurements. This tolerance allows for expansion and easier installation. Mark measurements on foam with a marker, then use a straight edge and utility knife to make clean cuts. Score the surface first, then cut through with multiple passes.
Apply Adhesive or Install Clips
If using adhesive: Apply construction adhesive (PL300 or similar) in a zigzag pattern directly onto the door surface. Work one panel at a time—adhesive sets in 10-15 minutes.
If using retainer clips: Snap clips into pre-drilled holes in door rails according to kit instructions. Clips hold panels in place without permanent adhesive.
Insert and Press Panels
Slide insulation panel into the door section. If using adhesive, press firmly across the entire surface to ensure good contact. Start from the center and work outward to push out air bubbles. Hold for 30 seconds. For friction-fit or clip installations, ensure panel edges sit snugly within the door rails.
Repeat for All Sections
Work your way through all panel sections, saving the top row for last (easier to reach from ground level first). Most 16×7 doors have 16-20 individual sections. Take breaks as needed—no rush.
Test Door Balance
This is the most important step. Adding insulation increases door weight by 15-30 pounds. Disconnect the opener by pulling the emergency release cord. Manually lift the door to the halfway point and release. If the door stays in place, balance is acceptable. If it falls or rises, springs need professional adjustment.
Optional: Seal Edges
For maximum efficiency, apply foam weatherstripping tape around panel edges where they meet the door frame. This prevents air infiltration around the insulation. Also check and replace worn bottom and side weatherstripping.
Common Mistakes to Avoid
❌ Cutting Panels Too Large
Forcing oversized panels causes bowing and stress on door hardware. Always cut 1/4" smaller than measured dimensions.
❌ Skipping the Balance Test
Added weight strains opener motors and springs. An unbalanced door can damage your $400+ opener. Always test after installation.
❌ Using the Wrong Adhesive
Some adhesives dissolve foam. Use construction adhesive specifically rated for foam (PL300). Avoid contact cement or hot glue.
❌ Ignoring Dirty Surfaces
Adhesive won't bond to dusty or oily metal. Clean and dry surfaces thoroughly, or panels will fall off within weeks.
❌ Blocking Ventilation
If your door has vents, don't cover them with insulation. Vents prevent pressure buildup and condensation issues.
❌ Cheap Thin Foam
Dollar-store craft foam provides almost no insulation. Invest in proper rigid foam (1.5"+ thick) for meaningful R-value.
After Installation
Maintenance
- Inspect panels annually for shifting or damage
- Replace any panels that become waterlogged or compressed
- Check weatherstripping each fall before winter
- Clean door surfaces when washing the car
When to Call a Professional
For more details on professional vs DIY options, see our complete insulation guide.
- Door is unbalanced after installation (spring adjustment needed)
- Opener motor strains or fails to lift door
- Door makes new noises or operates differently
- You have a specialty door (glass, wood, or custom)
Frequently Asked Questions
Need Help with Spring Adjustment?
Completed your DIY insulation but need spring rebalancing? We offer same-day service across Toronto & GTA. Book online.
437-265-9995Spring adjustment after insulation: $50-100 | See full pricing