A misaligned garage door isn't just annoying - it can cause premature wear on rollers, cables, and even the door itself. As a garage door technician in Toronto, I see alignment issues cause expensive damage when left unchecked. In this guide, I'll walk you through how to diagnose and fix both track and sensor alignment problems.
Two Types of Garage Door Alignment
Track Alignment
What it affects: Door movement, roller wear, noise levels
Signs of problems:
- Door appears crooked when moving
- Grinding or scraping sounds
- Door sticks at certain points
- Gaps between rollers and tracks
DIY difficulty: Moderate
Time required: 30-45 minutes
Sensor Alignment
What it affects: Door closing, safety feature operation
Signs of problems:
- Door won't close (reverses immediately)
- Opener light blinks when closing
- Sensor LEDs blinking or off
- Door works with wall button but not remote
DIY difficulty: Easy
Time required: 10-15 minutes
Signs Your Garage Door Tracks Are Misaligned
Crooked Movement
Door tilts to one side while opening or closing, indicating one track is higher or farther from the wall.
Scraping Sounds
Metal-on-metal scraping indicates rollers rubbing against track edges due to misalignment.
Door Gets Stuck
Door stops at certain points, requiring manual assistance to continue. Usually happens at track joints.
Visible Gaps
Space visible between rollers and track walls where they should fit snugly (about 1/4" clearance is normal).
Rubbing at Curves
Noise specifically where vertical tracks curve into horizontal sections - common problem area.
Motor Strain
Opener sounds like it's working harder than usual or trips the built-in thermal overload.
How to Realign Garage Door Tracks
Tools You'll Need
Safety Warning: Disconnect the Opener First!
Before any track work, pull the red emergency release cord to disconnect the door from the opener. Work with the door fully closed to prevent it from moving unexpectedly. Never work on tracks while the door is open - it could fall.
Track Alignment Steps
- Disconnect the Opener Pull the red emergency release cord hanging from the opener rail. This allows manual door operation and prevents accidental activation.
- Inspect Both Tracks Look for bends, dents, or rust. Check where vertical tracks meet horizontal sections. Look for loose brackets or missing hardware.
- Check Track Spacing Tracks should be equidistant from the door edges (typically 1/4" gap). Use a ruler to measure at top, middle, and bottom.
- Loosen Track Brackets Using a socket wrench, loosen (don't remove) the bolts holding track brackets to the wall. Start with the problem area.
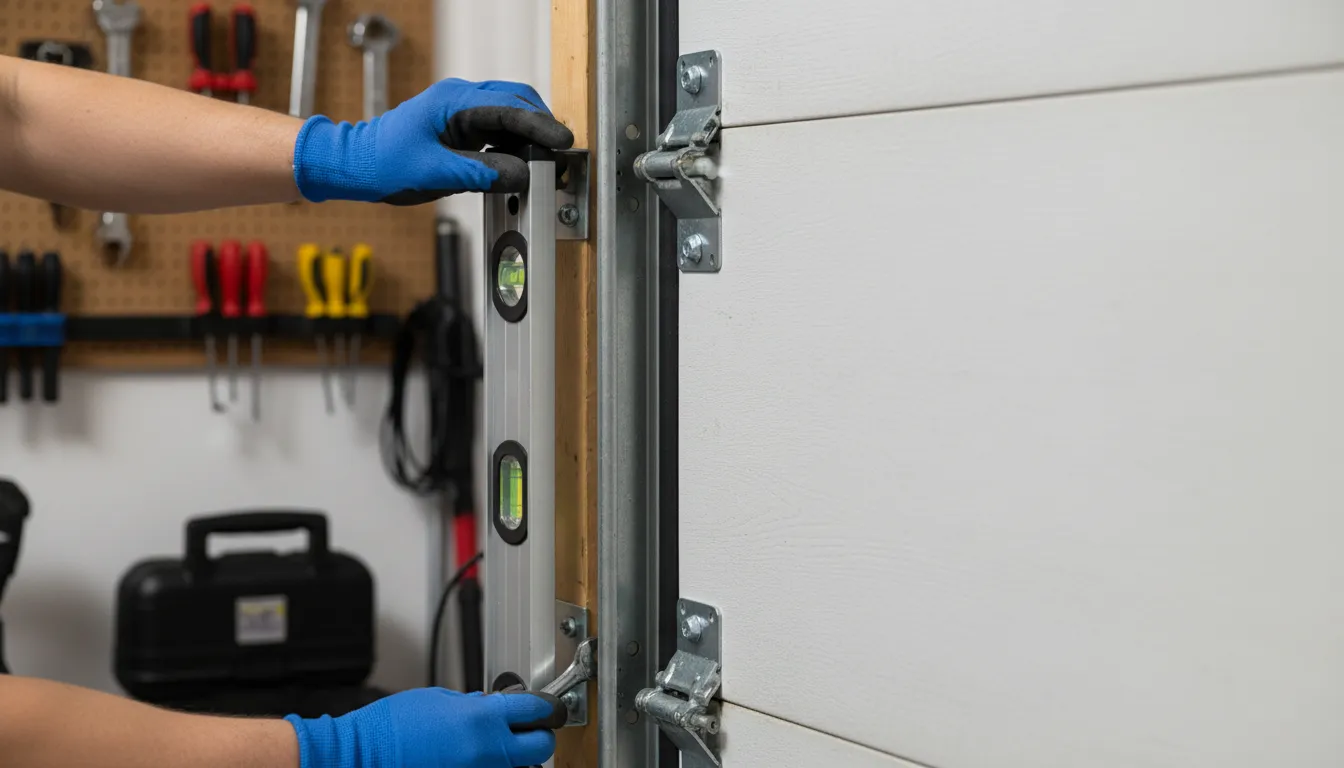
- Level and Adjust Place a level against the vertical track. Gently tap the track with a rubber mallet until perfectly plumb (vertical). Have a helper hold it in place.
- Check Horizontal Sections Horizontal tracks should slope slightly toward the back of the garage (about 1/4" per foot). This helps the door stay closed.
- Tighten and Test Retighten all brackets securely. Manually open and close the door several times. Listen for smooth, quiet operation.
Pro Tip: Check Track Joints
Most track problems occur where sections join together. Use a straightedge across joints to ensure a smooth transition. Any lip or gap will cause rollers to catch. You can file down minor imperfections with a metal file.
How to Align Garage Door Safety Sensors
Safety sensors (photoelectric eyes) are required on all garage door openers manufactured after 1993. When misaligned, they prevent the door from closing.
Understanding Sensor Light Codes
Solid Green
Receiving sensor - properly aligned
Solid Amber/Yellow
Sending sensor - has power
Blinking Green
Misaligned - adjust sensor angle
No Light
No power - check wiring
* Light colors vary by brand. LiftMaster/Chamberlain use amber (send) and green (receive). Genie uses red for both.
Sensor Alignment Steps
- Clean the Sensor Lenses Wipe both sensor lenses with a clean, dry cloth. Dust, spider webs, and dirt are the #1 cause of "alignment" issues.
- Check for Obstructions Ensure nothing blocks the invisible beam between sensors: brooms, boxes, cables, or even sunlight glare.
- Check Sensor Height Both sensors should be at the same height (typically 6" off the floor). Use a level across both to verify.
- Loosen Mounting Bracket Most sensors have a wing nut or screw holding them to the bracket. Loosen enough to allow adjustment, but not so loose they fall.
- Align the Receiving Sensor This is the one with the green LED (usually). Slowly tilt it up/down and left/right until the LED turns solid.
- Tighten and Test Once aligned, carefully tighten the bracket. Test by closing the door, then breaking the beam with your foot - door should reverse.
Pro Tip: The String Method
For stubborn sensor alignment, tie a string between both sensors at lens height. This creates a visual guide for the beam path. Make sure nothing touches or crosses the string, then align sensors to point directly along it.
When to Call a Professional
Some alignment issues require professional tools and expertise:
- Bent or damaged tracks - May need replacement, not just adjustment
- Severely crooked door - Could indicate spring or cable problems
- Track gaps at the wall - Brackets may have pulled out of framing
- Repeated sensor failures - Wiring or opener board issues
- Door came off tracks - Safety risk; don't attempt to put back yourself
Professional Alignment Costs in Toronto
| Service | Cost Range | Notes |
|---|---|---|
| Track adjustment/alignment | $100 - $200 | Minor adjustments included in tune-up |
| Track replacement (per track) | $150 - $400 | Necessary if tracks are bent or damaged |
| Sensor alignment | $80 - $120 | Often included in service calls |
| Sensor replacement (pair) | $120 - $180 | If sensors are damaged beyond repair |
| Full tune-up (includes alignment) | $100 - $120 | Best value - includes all adjustments |
At Royal Garage Door Repairs, we include track and sensor alignment as part of our $100-$120 maintenance package. This is often the most cost-effective option since we'll also lubricate all components and check for other issues.
Need Professional Alignment Help?
Can't get your door or sensors aligned? Our Toronto technicians solve any alignment issue same-day. Book online.
Call 437-265-9995