Types of Garage Door Insulation Panels
Four main types of insulation panels are used for garage doors, each with distinct properties suited to different needs and budgets. For a complete overview including costs and DIY vs pro installation, see our complete insulation guide. Understanding these differences helps you choose the right option for your specific situation.
Expanded Polystyrene (EPS) Panels
The most common DIY option. White foam boards available at any hardware store. Lightweight, affordable, and easy to work with.
Advantages
- Lowest cost option
- Easy to cut with utility knife
- Widely available
- Very lightweight
Disadvantages
- Lower R-value per inch
- Can absorb moisture
- Less durable
- May degrade over time
Polyurethane Foam Panels
Premium option with highest R-value. Used in factory-insulated doors. Can be purchased as pre-cut kits or spray-applied.
Advantages
- Best R-value per inch
- Moisture resistant
- Adds structural rigidity
- Long-lasting
Disadvantages
- Higher cost
- Harder to cut precisely
- Less forgiving of mistakes
- Pre-cut kits may not fit all doors
Polyisocyanurate (Polyiso) Panels
Commercial-grade foam with foil facing. Excellent thermal performance with built-in radiant barrier. Popular for new construction.
Advantages
- High R-value
- Foil adds radiant barrier
- Fire resistant
- Dimensionally stable
Disadvantages
- R-value decreases in cold temps
- Edges can crumble
- Foil can tear
- Moderate cost
Reflective Foil Panels
Thin multi-layer panels with foil facing and bubble or foam core. Works by reflecting radiant heat rather than resisting conduction.
Advantages
- Very thin profile
- Easy to install
- Excellent for hot climates
- Lightweight
Disadvantages
- Less effective in cold
- Needs air gap to work
- R-value claims often inflated
- Not ideal for Canadian winters
Panel Comparison Chart
| Feature | EPS | Polyurethane | Polyiso | Reflective |
|---|---|---|---|---|
| R-Value per inch | R-3.8-4.4 | R-6.0-7.0 | R-5.8-6.5 | R-1-3* |
| Best for cold climate | ○ | ✓ | ○ | ✗ |
| Moisture resistance | ✗ | ✓ | ✓ | ✓ |
| DIY-friendly | ✓ | ○ | ○ | ✓ |
| Cost per sq ft | $0.30 | $0.80 | $0.70 | $0.50 |
| Adds structural strength | ✗ | ✓ | ○ | ✗ |
*Reflective panel R-value depends heavily on installation with proper air gap.
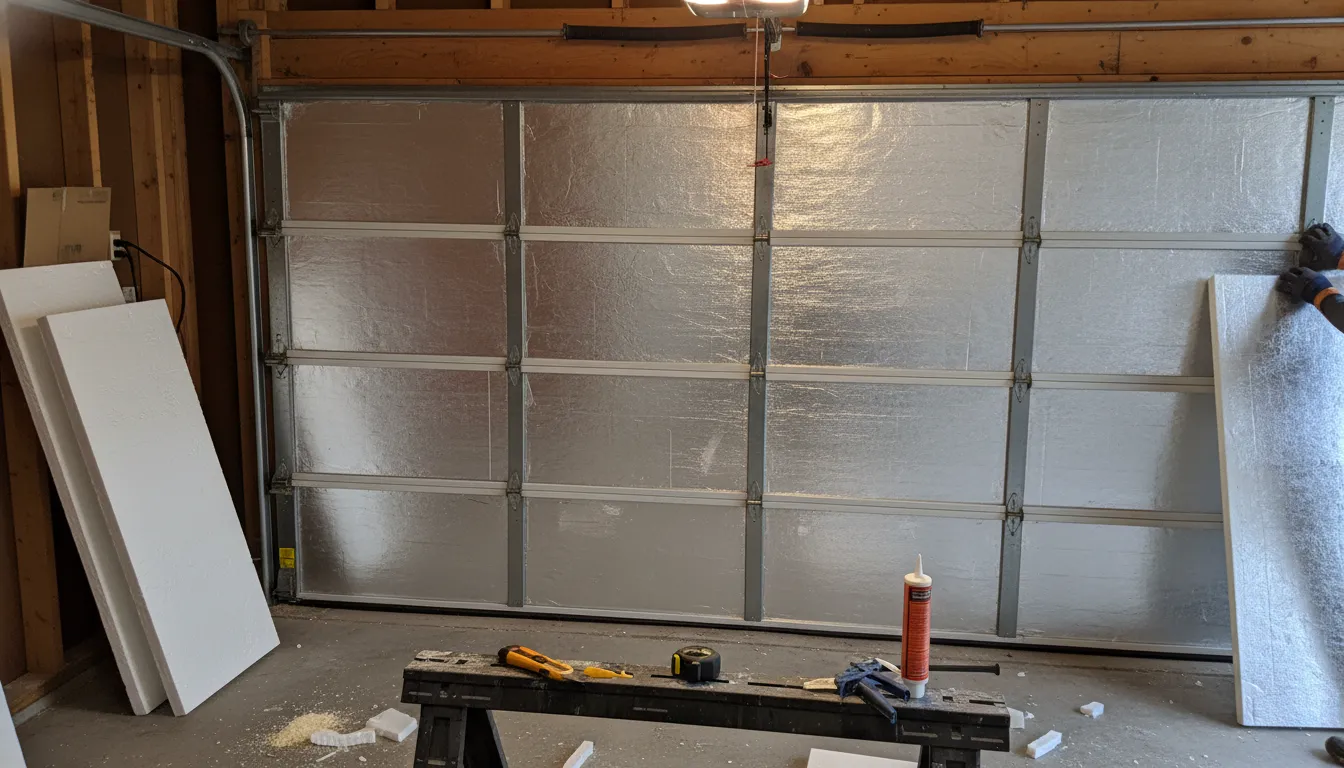
How to Install Insulation Panels
Installing rigid foam panels is a straightforward project that most homeowners can complete in an afternoon. Here's the step-by-step process:
Measure Each Panel Section
Garage door panels vary in size. Measure the internal width and height of each section. Note that sections may not be identical—the top panel often differs from lower ones.
Cut Panels to Size
Subtract 1/4" from each dimension for expansion tolerance. Use a straight edge and utility knife for EPS, or a fine-tooth saw for polyurethane. Cut slightly oversized and trim for a snug fit.
Clean Door Surfaces
Wipe down the interior of each panel section with a damp cloth to remove dust and oils. Let dry completely. This ensures adhesive bonds properly.
Apply Adhesive
Use construction adhesive (PL300 or similar) in a zigzag pattern on the door surface. Alternatively, use double-sided foam tape for easier future removal.
Insert Panels
Press panels firmly into place, starting from the center and working outward. The panel should fit snugly within the door rails. Some panels friction-fit without adhesive.
Seal Edges (Optional)
For maximum efficiency, seal gaps around panel edges with foam weatherstripping tape. This prevents air infiltration around insulation.
Which Panel Type Should You Choose?
For Maximum Insulation (Heated Garages)
Choose polyurethane panels at 2" thickness for R-13+. Worth the extra cost if you heat your garage or have living space above. The added structural rigidity also quiets door operation.
For Best Value (Typical Attached Garage)
Go with polystyrene (EPS) panels at 2" thickness for R-8. Provides 80% of the benefit at 40% of the cost. Perfect for attached garages where you want temperature moderation without heating.
For Thin Profile Needs
If your door panels have limited depth, polyisocyanurate with foil facing offers the best R-value in thin formats. The 1" panels provide R-6 and fit where thicker options won't.
For Hot Climate Focus
Reflective foil panels excel at keeping summer heat out. However, for Canadian winters, they offer minimal benefit. Consider them only if cooling is your primary concern.
Pre-Cut Panel Kits vs. DIY Cutting
You have two options for sourcing insulation panels: pre-cut kits designed for standard door sizes, or buying sheets and cutting yourself.
Pre-Cut Kits
- Pros: Faster installation, precise fit, includes retainer clips, less waste
- Cons: More expensive, may not fit non-standard doors, limited material options
- Cost: $80-150 for standard 16×7 door
- Available at: Home Depot, Lowe's, Amazon.ca
DIY Cutting from Sheets
- Pros: Lower cost, exact fit for any door, material choice flexibility
- Cons: More time, requires precise measurement, generates waste
- Cost: $40-80 for standard 16×7 door
- Available at: Building supply stores, Home Depot
Frequently Asked Questions
Need Professional Insulation Installation?
We install insulation panels and adjust springs for optimal balance. Same-day service across Toronto & GTA. Book online or see pricing.
437-265-9995