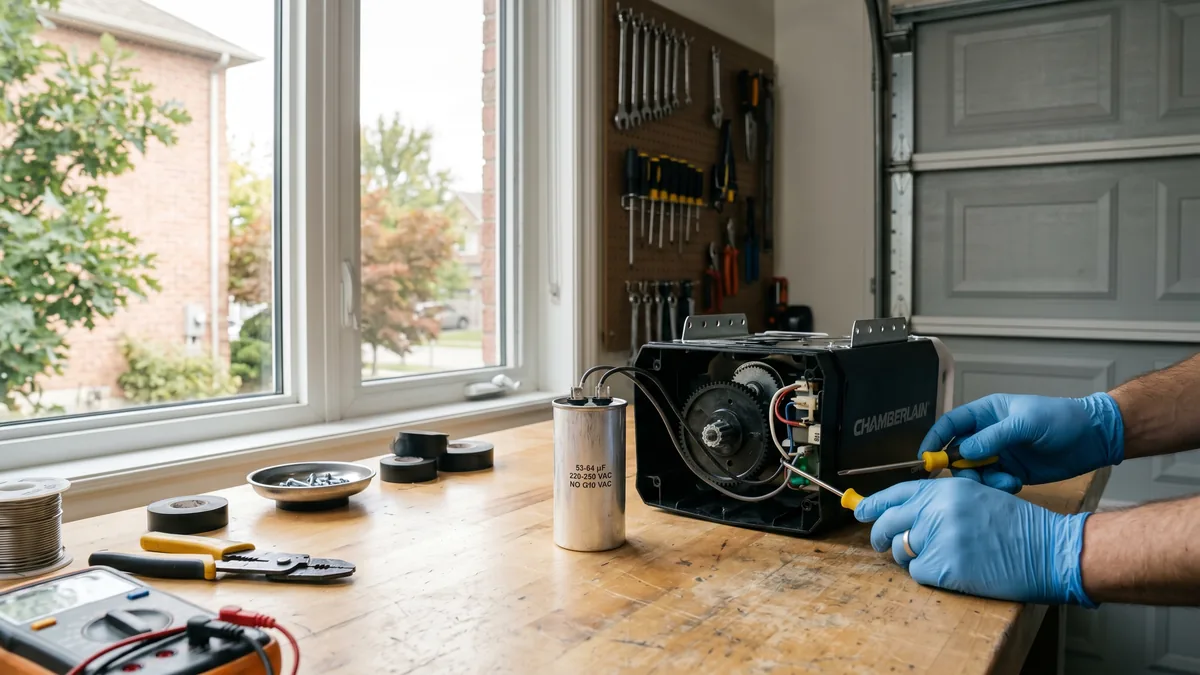
A failing garage door opener capacitor usually makes the motor hum or buzz but not turn, start slowly, or stall partway. To fix it: unplug the opener, remove the motor cover, discharge the capacitor with an insulated screwdriver, then swap in a new one matching the exact microfarad (uF) and voltage rating printed on the old part. The part costs about $15–$40, but the stored charge is dangerous — if unsure, call a technician.
What Is a Garage Door Opener Capacitor?
A capacitor is a small cylindrical or box-shaped component inside the opener’s motor housing that stores and releases a burst of electrical energy. In a single-phase AC opener it acts as a start capacitor: it shifts the electrical phase to give the motor the extra torque it needs to break free from a standstill and begin turning. Without that boost, the motor cannot start — it only hums.
If your garage door opener suddenly hums, clicks, or buzzes but the door won’t budge, the culprit is very often a $20 capacitor — not a dead motor or a circuit board that needs the whole unit replaced. After 15 years diagnosing openers across Toronto and the GTA, I can tell you this is one of the most misdiagnosed faults out there, and one of the cheapest to fix when caught correctly.
Symptoms of a Bad Garage Door Opener Capacitor
The capacitor is a startup component, so almost every symptom appears at the moment you press the button. Here are the patterns I look for first:
- Motor hums but the door doesn’t move: The single most reliable sign. You hear the motor energize with a steady hum or buzz, but the carriage stays still. If you give the door a manual nudge and the motor then catches and runs, the capacitor is almost certainly weak.
- Slow or weak start: The door lurches into motion sluggishly or hesitates for a second or two before moving. A capacitor that has lost capacity can no longer deliver a full starting kick.
- Door starts then stalls: It moves a few inches, loses power, and stops — sometimes followed by the motor humming on its own.
- Intermittent operation: Works fine on warm afternoons, fails on cold GTA mornings. Capacitors lose performance in extreme temperatures.
- Clicking relay, no movement: You hear the control board relay click but the motor never spins up.
- Visible or smell warnings: A capacitor with a bulging or domed top, leaking oily residue, a cracked case, or a sharp burnt/fishy smell has failed outright.
Why Garage Door Opener Capacitors Fail
Capacitors are consumable parts — they degrade slowly until they can no longer hold enough charge. The common accelerators are:
Heat and Temperature Swings
Heat is the number-one enemy of any capacitor. Electrolytic capacitors dry out faster the hotter they run. Here in the GTA, an unheated detached or attached garage that drops to −25°C in January and bakes in July heat puts a capacitor through punishing thermal cycling, which shortens its lifespan well below the 8–15 year average.
Frequent Cycling and Overwork
Every start draws heavily on the capacitor. A busy household door that cycles 8–10 times a day ages its capacitor faster than one used twice a day. A door that is out of balance, dragging in bent tracks, or fighting failing springs makes the motor strain on every start — and that strain flows straight through the capacitor.
Power Surges and Age
Voltage spikes from storms or grid surges can puncture the dielectric inside a capacitor. And like any part, age alone takes its toll — if your opener is 12+ years old and acting up, the capacitor is a prime suspect even with no other obvious cause.
How to Test a Garage Door Opener Capacitor
Before you buy a part, confirm the capacitor is actually the problem. Work safely and methodically:
- Unplug the opener. Pull the plug from the ceiling outlet completely — do not rely on the wall switch. This is non-negotiable.
- Open the motor housing. Remove the light lens and the cover screws to expose the internals. The capacitor is the cylindrical metal or plastic can with two or three wire leads, usually mounted near the motor windings.
- Discharge it. A capacitor holds a charge even when unplugged. Touch the metal shaft of an insulated screwdriver across both terminals at once to safely short them out before you handle anything. You may hear a small snap.
- Inspect visually. Look for bulging, leaking, scorch marks, or a swollen top. Any of these confirms failure — no meter needed.
- Test with a multimeter (capacitance mode): Disconnect the leads, set your meter to the uF/capacitance setting, and probe the terminals. A healthy capacitor reads within about 10% of its rated value (printed on the side). A reading far below rating, near zero, or open-circuit means replace it.
How to Replace a Garage Door Opener Capacitor
Once you have confirmed the fault and bought a matching part, the swap itself is straightforward. The risk is electrical, not mechanical.
- Confirm the opener is unplugged and the capacitor is discharged (see the testing steps above).
- Photograph the wiring so you can reconnect leads to the correct terminals.
- Remove the old capacitor: Loosen the mounting clamp or bracket and disconnect the wire leads (slide-on spade connectors on most models).
- Install the new capacitor: Mount it in the same orientation, reconnect the leads to matching terminals. Most start capacitors are non-polarized, but follow your wiring photo exactly.
- Reassemble the housing, replace the cover and light lens.
- Restore power and test a full open/close cycle. The door should now start crisply without humming.
Matching the Right Capacitor
This is where most DIY replacements go wrong. You must match two values printed on the side of the old capacitor:
- Capacitance (uF / MFD): Most residential openers use a start capacitor in the 40–90 uF range. Match it exactly.
- Voltage (VAC): Typically 120, 165, 200, or 250 VAC. You may go up in voltage rating but never down, and never change the uF value.
If the label is unreadable, the value is listed in your opener’s manual or available from the manufacturer’s parts line. For broader board and motor issues that mimic a capacitor fault, our garage door opener repair page covers full diagnostics.
Repair the Capacitor or Replace the Opener?
A capacitor swap brings a humming opener back to life for a few dollars — but it isn’t always the right call. Use this comparison to decide:
| Factor | Replace Capacitor | Replace Opener |
|---|---|---|
| Opener age | Under 10 years | 12+ years |
| Cost | $120–$160 professional repair | From $600 supplied + installed |
| Other faults present | None — capacitor only | Worn gears, noisy, dead board |
| Safety features | Existing UL 325 sensors fine | Want rolling-code, myQ, battery backup |
| Drive condition | Belt/chain in good shape | Stretched, grinding drive |
| Best when | Single clear fault, modern unit | Recurring failures, obsolete model |
My rule of thumb: if the opener is under 10 years old, the capacitor is the only fault, and the drive and gears are healthy, replace the capacitor — a professional repair is $120–$160. If the unit is well over a decade old, already noisy or grinding, or you want modern features like a sealed rolling-code remote and battery backup, compare it with a new opener: chain drive starts at $600, belt-drive DC at $630, smart/myQ at $760, and jackshaft/wall-mount at $800, supplied and installed.
Key Takeaways
- A humming motor that won’t move is the classic capacitor symptom.
- Always unplug and discharge before touching the capacitor.
- Match the uF and VAC ratings exactly when replacing.
- Heat and cold GTA garages shorten capacitor life to under the 8–15 year norm.
- Under 10 years and no other faults? Replace the capacitor. Older or failing unit? Replace the opener.
Opener Humming But Won’t Open?
Don’t replace the whole opener until it’s diagnosed properly. Royal Garage Doors tests the capacitor, board, and door balance and gives you the honest, cheapest fix. FREE service call with any repair across Toronto & GTA, same-day available.
Call 437-265-9995Frequently Asked Questions
Authoritative references: LiftMaster opener troubleshooting and the International Door Association (IDA) technician standards.