To tighten a loose garage door opener chain: unplug the opener, locate the adjustment bolt on the trolley, and tighten the front nut clockwise until the chain has approximately 1/2 inch of sag at the midpoint of the rail. Do not over-tighten — a chain that is too tight causes motor strain and premature bearing wear. The 1/2 inch rule is the industry standard for all major brands including LiftMaster and Chamberlain.
What Is Chain Tension on a Garage Door Opener?
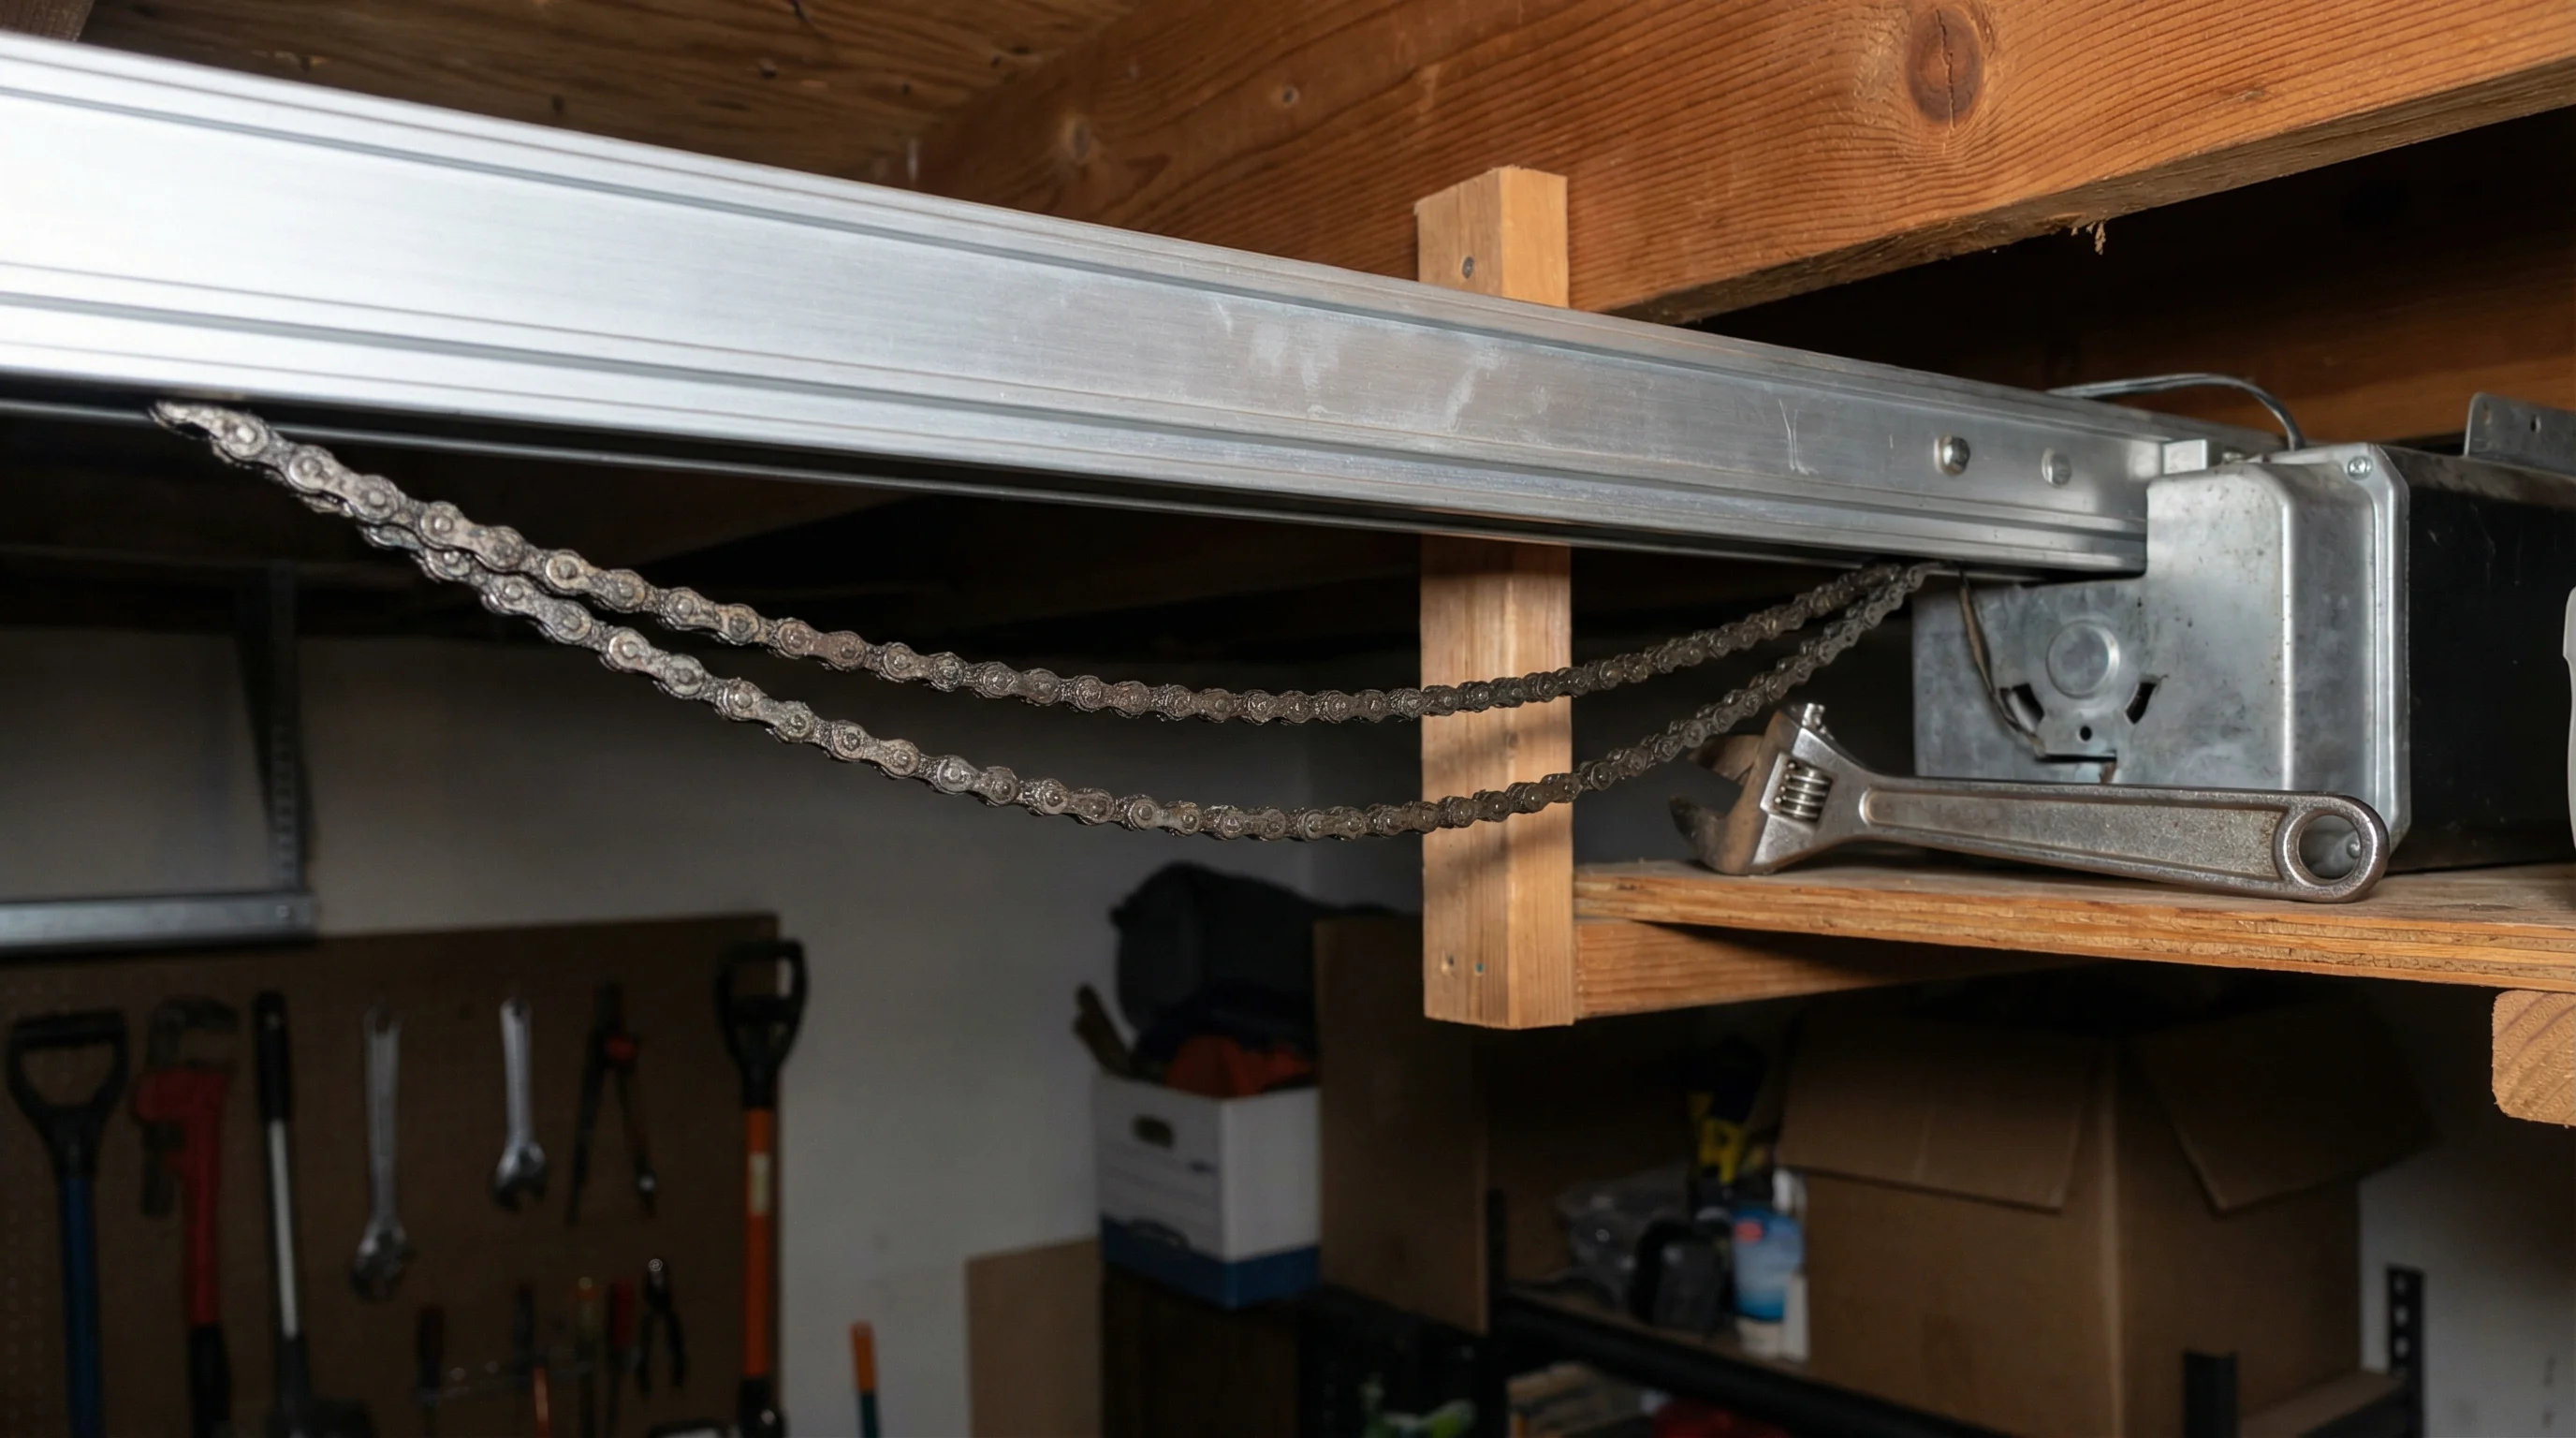
Chain tension refers to how taut the drive chain is on a chain-drive garage door opener. The chain runs from the motor drive sprocket along the trolley rail to move the trolley (and attached door) up and down. Correct tension means approximately 1/2 inch of downward sag at the midpoint of the rail — enough to prevent binding but not so loose it slaps or skips.
That loud banging noise every time your garage door opens or closes? It's probably a loose chain hitting the rail. This is one of the most common garage door opener issues in the GTA, especially after Toronto winters when metal components expand and contract repeatedly. The good news: tightening a chain takes about 20 minutes and requires only a wrench and a ladder.
Why Garage Door Opener Chains Get Loose
All drive chains stretch over time — it's a fundamental property of metal links under repeated load cycles. A typical chain-drive opener cycles 4-8 times per day. Over a year, that's 1,500-3,000 cycles of tension and release. The chain gradually elongates and starts to sag.
Additional factors that cause chains to loosen faster in the GTA:
- Temperature cycling: Toronto winters can drop to -25°C while summers reach 35°C+. Metal contracts in cold and expands in heat. Over years, this cycling causes steel chain links to wear at the pins and rollers.
- Lack of lubrication: Dry chains wear faster at the pin-and-roller contact points, accelerating elongation. A properly lubricated chain lasts significantly longer.
- Heavy doors: Heavier insulated steel doors common in GTA homes put more load on the chain with each cycle, stretching it faster than lightweight doors would.
- Original installation: Some chain drives are installed with inadequate tension, or the tension is set correctly but never re-checked after initial break-in (first 30-60 days of use).
Is a Loose Chain Dangerous?
A slightly loose chain is primarily a noise problem. A severely loose chain becomes a safety concern. Here's what can happen if left unaddressed:
- Chain skipping: A loose chain can skip on the drive sprocket, causing the door to jerk mid-travel or stop unexpectedly.
- Gear damage: When the chain skips, it puts severe shock loads on the drive sprocket and the opener's plastic gear — the most commonly replaced component on chain drives.
- Chain derailment: In extreme cases, a very loose chain can derail from the sprocket entirely. When this happens, the door may drop suddenly with no motor resistance — a serious safety hazard.
- Rail impact: Slapping the rail repeatedly creates vibration that loosens the rail bracket hardware over time.
How to Properly Tighten a Chain Drive Opener
These steps apply to most major chain-drive openers including LiftMaster 8165, 8160, and similar; Chamberlain B-series chain drive; Craftsman chain drives; and most other residential chain-drive openers.
- Unplug the openerBefore doing anything, pull the power cord from the outlet. This prevents accidental door operation while you're working near the chain. If you can't reach the outlet, flip the circuit breaker for the garage.
- Locate the adjustment mechanismOn most openers, the chain tension adjustment is on the trolley — the metal carriage that rides along the rail. You'll see a threaded bolt with a front nut and a rear nut. On some models it may be at the motor head end of the rail.
- Measure current sagWith a ruler or tape measure, check how far the chain sags below the bottom of the rail at its lowest point (typically near the midpoint of the rail). Note the measurement — you want to get this to approximately 1/2 inch (13mm).
- Loosen the rear lock nutUsing the appropriate wrench (usually 7/16" or 1/2"), loosen the rear lock nut (the one closest to the motor head) by turning it counterclockwise several turns. This gives the adjustment bolt room to move.
- Tighten the front adjustment nutTurn the front nut clockwise to increase tension. Make small adjustments — about 1/4 turn at a time. Recheck the chain sag after each adjustment. You're tightening the chain by pulling the trolley slightly closer to the motor head end.
- Achieve 1/2 inch of sagStop adjusting when the chain has approximately 1/2 inch of downward sag at the midpoint of the rail. Measure carefully — too tight is as bad as too loose. A correctly tensioned chain should feel firm but not rigid when you push it sideways gently.
- Lock down the rear nutOnce you're satisfied with the tension, hold the front adjustment nut in place with one wrench and tighten the rear lock nut clockwise with a second wrench until it's snug against the trolley. This locks your adjustment in place.
- Test the operationPlug the opener back in. Run the door through 2-3 complete open/close cycles and listen for noise. The banging should be gone. Verify the door travels smoothly without hesitation. Check the chain sag one more time after cycling — it should still be at 1/2 inch.
How Tight Should the Chain Be? (The 1/2 Inch Rule)
The universal standard for residential garage door opener chain tension is 1/2 inch (approximately 13mm) of sag measured from the bottom of the rail to the bottom of the chain at the midpoint of the rail. This measurement applies to virtually all residential chain-drive openers on the market.
Why 1/2 inch? This tension level:
- Prevents the chain from slapping the rail during operation
- Avoids over-tensioning the chain which causes motor strain and bearing wear
- Accommodates slight temperature-related expansion and contraction without binding
- Keeps the chain on the drive sprocket reliably during normal operation
| Chain Tension | Sag Measurement | Result |
|---|---|---|
| Too loose | More than 3/4” (19mm) | Banging, skipping, gear damage risk |
| Correct | Approximately 1/2” (13mm) | Quiet, smooth, long life |
| Too tight | Less than 1/4” (6mm) | Motor strain, bearing wear, binding |
When a Loose Chain Means You Need a New Opener
Not every loose chain can be solved by adjustment alone. Sometimes the chain has stretched so much that even maximum adjustment can't achieve 1/2 inch of sag. In other cases, the problem isn't the chain tension at all — it's a worn component.
Signs that your opener needs professional diagnosis or replacement:
- Chain returns to loose quickly after adjustment: The drive sprocket teeth are worn and no longer grip the chain properly.
- Grinding or clicking at the motor head: The internal drive gear (plastic) is stripped. Gear kit replacement costs $150-$250 including labor.
- Door doesn't fully open or close: The trolley carriage may be damaged from repeated chain impacts.
- Opener is 15+ years old: At this age, rebuilding makes less financial sense than replacement. New LiftMaster chain or belt drive openers start at $680 installed.
Chain Still Banging After Adjustment?
If your chain won't stay tight, or you're hearing grinding noises, it could be a worn drive gear or sprocket. We diagnose garage door opener problems free with any service call.
Call 437-265-9995 — Free Diagnosis