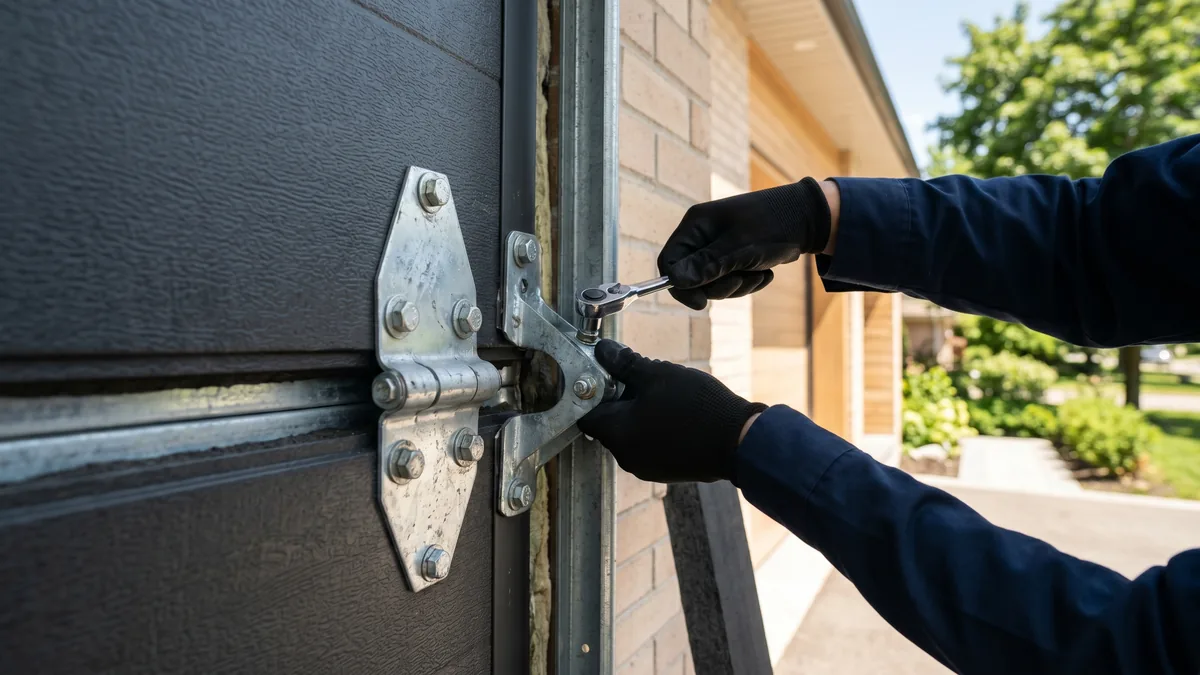
Garage door hinges connect the horizontal sections of a sectional door and let it bend through the curved track. There are two main types: center hinges (stamped with a number) and end hinges (which also hold the rollers). The stamped number 1, 2, 3 or 4 shows the hinge’s height on the door — higher numbers have a deeper offset to follow the track curve. Always replace a hinge with the same number, lubricate annually, and replace any hinge that is cracked, rusted, or has elongated screw holes.
What Is a Garage Door Hinge?
A garage door hinge is a stamped-steel bracket fastened across the seam between two door sections. It allows each section to pivot relative to the next so the door can flex from vertical to horizontal as it rolls into the overhead track. On a standard sectional door, hinges carry the door’s weight in motion and keep the panels aligned and sealed.
A noisy, popping garage door is one of the most common service calls we get across Toronto and the GTA — and surprisingly often the culprit is a worn or wrong-numbered hinge, not the opener or springs. Understanding how hinges are numbered and what each type does will help you diagnose the noise, order the right part, and know when it’s a safe DIY fix versus a job for a technician.
The Main Types of Garage Door Hinges
Every sectional garage door uses two fundamental hinge types, plus a few specialty variants. Knowing which is which is the first step to a correct repair.
Center Hinges (Numbered)
Center hinges run along the vertical centerline of the door, joining one section to the next. These are the hinges stamped with a number (1, 2, 3, etc.). A single-car door typically has one center hinge per seam; a double-wide door usually has two or three center hinges per seam to spread the load. Center hinges do not hold rollers — they are pure pivot points.
End Hinges (Roller Carriers)
End hinges sit at the left and right edges of each section seam and have a tube or sleeve that holds the roller stem. They do double duty: pivoting the sections and keeping the rollers seated in the track. Because they carry both the hinge load and the roller, end hinges — especially the lower ones near the cables — take more stress and wear faster. If you are also dealing with worn rollers, see our guide to garage door roller replacement, since rollers and end hinges are usually serviced together.
Top Roller Brackets and Bottom Brackets
The very top section uses an adjustable top roller bracket rather than a numbered hinge, and the bottom of the door uses bottom brackets that anchor the lift cables. The bottom brackets are under direct spring tension and are never a DIY part — loosening one can release stored energy violently.
What Do the Numbers on Garage Door Hinges Mean?
This is the question we hear most. The number stamped into a center hinge indicates its position on the door, counted from the bottom up:
- No. 1 hinge: joins the bottom (first) section to the second section.
- No. 2 hinge: joins the second section to the third.
- No. 3 hinge: joins the third section to the fourth.
- No. 4 hinge (and higher): used on taller doors with five or more sections.
The reason the numbers matter is offset. As the door bends into the horizontal track, the higher sections need to pivot at a slightly different angle to follow the curve. Manufacturers build a progressively deeper offset (the bend in the hinge leaf) into each higher-numbered hinge. A No. 1 hinge is nearly flat; a No. 3 or No. 4 has a pronounced offset.
Why the Offset Matters
If you install a No. 1 hinge where a No. 3 belongs, the sections won’t track the curve correctly. The door will bind, the rollers will be forced sideways in the track, and you’ll hear loud snapping at the bend. Matching the stamped number is essential — it is the single most common mistake DIYers make when buying replacement hinges.
| Hinge | Position on Door | Offset Depth | Typical Load |
|---|---|---|---|
| No. 1 | Bottom seam (sections 1–2) | Shallow / near flat | Highest — carries most weight |
| No. 2 | Sections 2–3 | Moderate | High |
| No. 3 | Sections 3–4 | Deeper | Moderate |
| No. 4+ | Tall doors, sections 4–5+ | Deepest | Lower |
| End hinge | Both edges, every seam | Varies (holds roller) | High at edges |
Gauge and Material
Hinges are also rated by steel gauge (thickness). Residential doors commonly use 14-gauge hinges; heavier, insulated, or wide double doors use 11-gauge for extra strength. Most quality hinges are galvanized to resist rust — an important detail in our climate, where road salt and slush accelerate corrosion. If your door is a heavier insulated model, see our overview of garage door replacement options where hardware grade is matched to door weight.
Signs of a Worn or Failing Hinge
Hinges rarely fail overnight; they give warning signs. Watch and listen for these:
- Popping or snapping noise as the door reaches the curve in the track — classic worn-hinge symptom, especially from a No. 1 hinge.
- Grinding or metal-on-metal scrape from the pivot pin wearing into an oval.
- Visible cracks radiating from the screw holes or the pin barrel.
- Elongated (oval) screw holes where the hinge has worked loose and chewed the holes.
- Rust or flaking on the leaf or pin — common in GTA garages exposed to winter salt.
- Gap or misalignment between two sections, or a section that sags at one corner.
- Metal shavings or dust on the floor directly below a hinge.
A worn hinge that’s ignored can let a section shift, which throws rollers out of the track and can eventually damage the panel itself. If a panel is already cracked or dented from a misaligned section, you may need garage door panel replacement rather than just a hinge.
How to Replace a Garage Door Center Hinge (Step by Step)
Replacing a center hinge is a reasonable DIY job because, with the door fully closed, the center hinges are not under spring tension. Here is the safe sequence Michael and our techs follow:
- Close the door completely and unplug the opener so it can’t activate while you work.
- Identify and buy the matching hinge. Read the stamped number on the old hinge and buy the exact same number and gauge. Take a photo and bring the old part to the supplier if unsure.
- Support the sections. The door is closed and resting, but have a helper steady the panels so they don’t shift when the hinge is off.
- Remove the old hinge. Back out the lag screws or carriage bolts (usually 5/16” or 7/16” hex head) with a socket or nut driver. Note exactly how it sat.
- Inspect the holes. If the screw holes in the door are stripped or chewed, the new hinge may need slightly longer self-tapping screws or relocated pilot holes.
- Fit the new hinge, matching the offset orientation of the old one, and tighten the fasteners firmly — snug, not over-torqued into the steel.
- Lubricate the pin, reconnect the opener, and cycle the door slowly two or three times by hand first, then with the opener, watching for smooth, quiet travel.
When to Call a Professional Instead
Leave the job to a technician if any of the following apply: the failing hinge is a lower end hinge in the cable zone, the door has a broken spring or is hard to lift by hand, you see multiple cracked hinges (a sign of a deeper alignment or balance problem), or the door is a heavy commercial unit. For tension-related issues such as springs, see our explainer on a broken garage door spring, and for openers struggling against a binding door, our garage door opener repair page covers the symptoms.
Hinge Cost, Maintenance and GTA Climate Notes
The hinge itself is one of the cheapest parts on a garage door — typically a few dollars each. The value of professional service is correct diagnosis (hinge vs. roller vs. spring vs. alignment) and doing the tension-related work safely. At Royal Garage Doors we usually address hinges as part of a broader visit:
- Maintenance / tune-up package: $120 + tax — includes lubrication, hardware tightening, balance check, sensor alignment, and full hinge and roller inspection.
- Cables & brackets: $180–$260 + tax (with bottom brackets $260) — for the tensioned hardware that often shows wear alongside lower hinges.
- Service call: FREE with any repair; a $120 diagnostic applies only if you choose not to proceed.
In the GTA, the biggest enemy of hinges is winter. Road salt tracked in on tires, melting slush, and humidity swings cause galvanized coatings to break down and pins to seize. We recommend wiping hinges clean and re-lubricating them at least once before winter and once in spring. For a complete seasonal routine, our team can fold hinge service into a yearly maintenance visit, and homeowners across the region can reach us through our garage door repair near me page.
For the technical standard behind sectional door hardware and the importance of matched, manufacturer-spec components, see the International Door Association resources at doors.org, and review the consumer safety guidance from the U.S. Consumer Product Safety Commission’s garage door publications at cpsc.gov.
Noisy Door or Cracked Hinge?
If your door pops at the curve, sags at a corner, or you’ve spotted a cracked hinge, our IDEA Certified techs will diagnose it correctly and fix it safely. Royal Garage Doors offers FREE service calls with any repair across Toronto & the GTA.
Call 437-265-9995