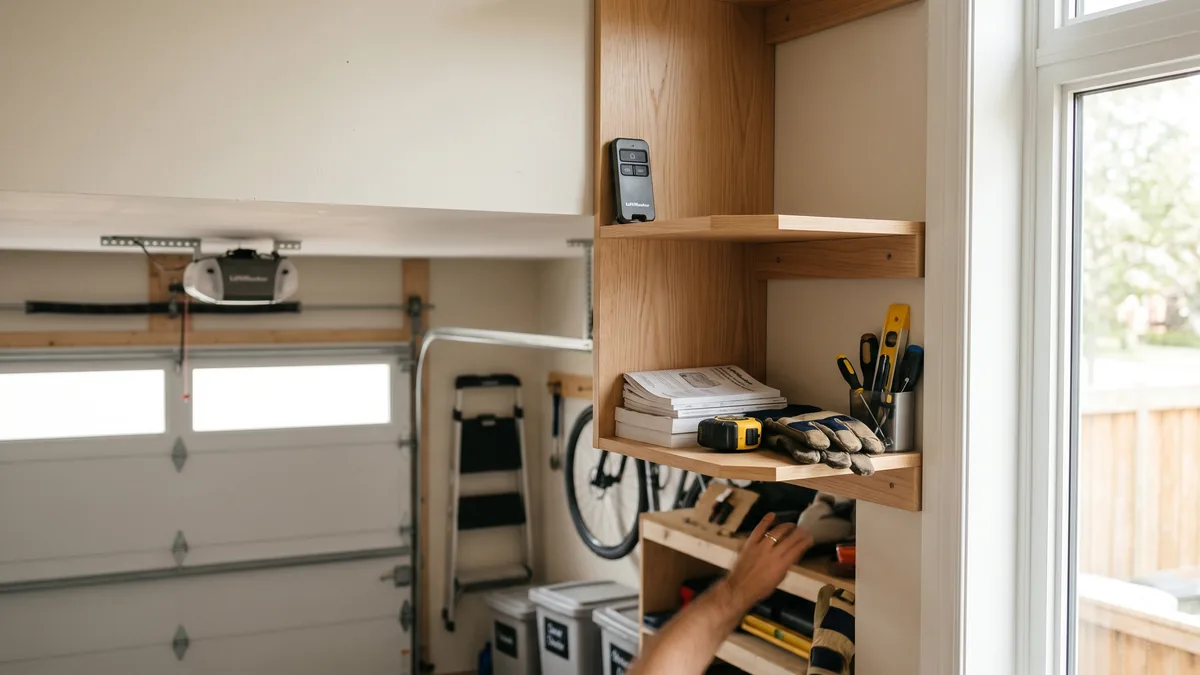
To childproof a garage door, keep all remotes out of a child's reach, mount the wall button at least 5 feet high, and engage the opener's lock (vacation) mode to disable the buttons. Equally important: verify the photo-eye safety sensors sit no higher than 6 inches off the floor and test the auto-reverse monthly with a flat 2x4. Any opener made before 1993 lacks reliable auto-reverse and should be replaced (from $630 installed). Together these steps remove every easy way for a child to operate or be hurt by the door.
What Does "Childproofing a Garage Door" Mean?
Childproofing a garage door means two things at once: removing the ways a child can operate the door (loose remotes, a low wall button, a shared keypad PIN) and confirming the safety systems that protect a child if the door does close — the photo-eye sensors and the auto-reverse force setting. A door is only truly child-safe when both the access controls and the safety features are working together.
Garage doors are the heaviest moving object in most GTA homes, and a curious toddler treats a glowing wall button or a dangling visor remote like a toy. After 15 years servicing doors across Toronto and Mississauga, I have seen the close calls — and the simple fixes that prevent them. This guide walks through every step to childproof your remotes, opener, keypad, and the door itself, in the order I recommend tackling them.
Why Childproofing the Garage Door Matters
A standard insulated double door weighs 150 to 200 pounds, and even a balanced door drops with real force if the safety system fails. The U.S. Consumer Product Safety Commission has long documented entrapment injuries to young children from automatic garage doors, which is why federal rules since 1993 require every residential opener to include both a photo-eye sensor and a mechanical auto-reverse. Health Canada echoes the same guidance on keeping children away from moving doors.
But the rules only protect you if the hardware works. Sensors drift out of alignment, get knocked by a bike, or are mounted too high to catch a small child. And no sensor stops a toddler who finds a remote and opens the door onto a driveway or a busy street. Childproofing closes both gaps. For an authoritative overview of opener safety standards, the Door & Access Systems Manufacturers Association (DASMA) publishes the technical data sheets that manufacturers follow.
Step 1: Secure Every Remote
Remotes are the most overlooked hazard because they are everywhere — clipped to visors, loose in cup holders, sitting on the kitchen counter, in a coat pocket. A child who can reach one can open the door from anywhere within range.
Where Remotes Hide in a Family Home
- Vehicle visor clips. A child buckled in a car seat or climbing into a parked vehicle can reach a visor remote. Move it to the glove box or a console that latches.
- Loose handheld remotes. Keep spares on a high hook or in a closed drawer above counter height, never in a basket by the door.
- Phone apps. If you use a smart opener app, lock your phone and disable any home-screen widget a child could tap. Smart openers also let you set notifications so you know every time the door moves.
If you have switched to a smartphone-controlled opener such as a myQ-enabled unit, our LiftMaster myQ setup guide walks through notifications and access controls. For programming a fresh remote after you relocate or replace one, see our Chamberlain opener programming guide.
Step 2: Mount and Lock the Wall Control Button
The wall control panel inside the garage is the single biggest temptation for a toddler — it is often at hip height and lights up. There are two fixes, and you should do both.
Raise It Out of Reach
Manufacturers and the CPSC recommend mounting the wall control at least 5 feet (1.5 m) above the floor, where the average pre-schooler cannot reach. If yours sits at a builder-standard 4 feet, relocating it higher is a quick, inexpensive job a technician can do during a service visit.
Use the Lock / Vacation Feature
Almost every modern multi-function wall panel (LiftMaster, Chamberlain, Genie) has a Lock or Vacation button. Press and hold it until the indicator light flashes, and the opener ignores every remote and the wall button until you turn it off. This is the fastest way to disable the door while kids are home alone in the garage or while you are away. If your panel is an old single-button model with no lock feature, upgrading the wall console is cheap and worthwhile.
Step 3: Verify the Photo-Eye Safety Sensors
The two small photo-eye sensors at the base of the door track send an invisible beam across the opening. If anything breaks the beam while the door is closing, the door must stop and reverse. This is the feature that protects a child who darts under a closing door.
Three Things to Check
- Height. Sensors must be mounted no higher than 6 inches above the floor. Higher than that and the beam can pass over a crawling baby or a small pet. If yours are too high, lower them.
- Alignment. Both LED indicator lights should glow steadily. A blinking or dark light means the eyes are knocked out of alignment — a common cause of a door that will not close, or worse, one that closes without reversing.
- Cleanliness. Dust, cobwebs, road salt, and condensation on the lenses block the beam. Wipe them with a soft dry cloth.
If a sensor is cracked, corroded by GTA winter salt, or will not stay aligned, it needs service. Sensor repair or replacement runs $120–$180 + tax — a small price for the feature that protects your kids. Learn more on our garage door opener repair page, and read our deep dive on a related fault in why a garage door reverses after hitting the floor.
Step 4: Test the Auto-Reverse Force Setting
Beyond the photo-eyes, every compliant opener has a mechanical auto-reverse: if the closing door physically contacts an object, it must reverse. This is the backstop if the sensors ever fail. Test it monthly — it takes 60 seconds.
The 2x4 Auto-Reverse Test
Lay a flat 2x4 board on the floor, on its wide side, directly under the door's path. Press the button to close the door. The moment the bottom of the door touches the board, it must stop and reverse to fully open. If the door keeps pushing, crushes the board, or stops without reversing, the force setting is too high or the opener is faulty — stop using it and call a technician.
Then test the photo-eye separately: start the door closing and wave a broom handle through the beam near the floor. The door should stop and reverse without touching anything. Run both tests and you have confirmed the two independent safety systems that protect a child.
Step 5: Manage Keypad PINs and Smart Access
A wireless keypad on the outside of the garage is convenient for kids coming home from school — but it is also a code that can be shared, watched, or guessed.
- Use a unique PIN that is not a birthday, house number, or 1234. Most keypads allow 4 to 8 digits.
- Use temporary codes for guests and trades. Many smart keypads let you issue a code that expires or works only during set hours. Delete it when the job is done.
- Do not let young children memorize the master PIN. If a child needs entry, give them a separate limited code you can revoke.
- Update rolling-code security. Openers from the last two decades use rolling (changing) codes that block code-grabbing devices. If your opener predates rolling codes, replacing it improves both child safety and break-in security.
Step 6: Address the Door Hardware Itself
Childproofing is not only about the opener. The door's mechanical parts carry their own pinch and crush risks for small fingers.
- Pinch-resistant section joints. Newer doors use a curved "finger-safe" joint between panels that closes the gap fingers can get caught in. If you are buying a new door, ask for pinch-resistant sections — see our garage door replacement options.
- Tamper-resistant bottom brackets. The bottom brackets are under cable tension and should never be touched. Tamper-resistant brackets discourage curious hands. Never adjust springs, cables, or bottom brackets yourself — they are under extreme tension and can cause serious injury. If a cable frays or a bracket loosens, call a pro; cable and bracket service runs $180–$260 + tax (with bottom brackets $260). Read more in our broken garage door cable guide.
- Manual slide lock. A simple T-handle or side slide lock lets you physically secure the door when the opener is off — handy for keeping the door shut overnight without relying on electronics.
When to Replace an Older Opener
If your opener was made before 1993, it may have no photo-eye sensors and an unreliable or missing auto-reverse. There is no safe retrofit that brings an old unit up to modern standards, so replacement is the right call for any family with children.
| Feature | Pre-1993 Opener | Modern Opener |
|---|---|---|
| Photo-eye sensors | Often none | Required, 6 in. max height |
| Mechanical auto-reverse | Unreliable / absent | Standard, adjustable force |
| Wall-button lock mode | Rare | Common |
| Rolling-code security | No (fixed code) | Yes |
| Smartphone control / alerts | No | Available (myQ, etc.) |
A new opener with sensors, auto-reverse, rolling-code security, and (on many models) smartphone alerts starts at from $600 + tax installed, including programming for LiftMaster, Chamberlain, or Genie units. See full pricing on our pricing page and the breakdown in our opener installation cost guide. Brand-specific help is on our LiftMaster, Chamberlain, and Genie repair pages.
Childproofing Costs in the GTA
Most childproofing steps are free or near-free. Here is what the upgrades that need a technician typically cost across Toronto and the GTA:
| Service | Typical Cost (CAD) |
|---|---|
| Maintenance & safety tune-up (sensor align, balance, lube) | $120 + tax |
| Safety sensor repair / replacement | $120–$180 + tax |
| Cables & brackets (with bottom brackets) | $180–$260 ($260) + tax |
| New opener (sensors + auto-reverse + rolling code) | from $600 + tax |
| New pinch-resistant door, supply + install (8×7) | from $1,350 + tax |
Every repair includes a FREE service call — the $120 diagnostic fee only applies if you choose not to proceed. New openers and doors carry a 1-year labour and 5-year hardware warranty (lifetime on door panels). Ready to book? Use our online booking or call, and see why families across the GTA trust us on our reviews page.
Want a Professional Safety Check?
A Royal Garage Doors technician can align your sensors, mount your wall button out of reach, test the auto-reverse, and replace any unsafe opener — all with a FREE service call across Toronto & the GTA. Same-day appointments available.
Call 437-265-9995