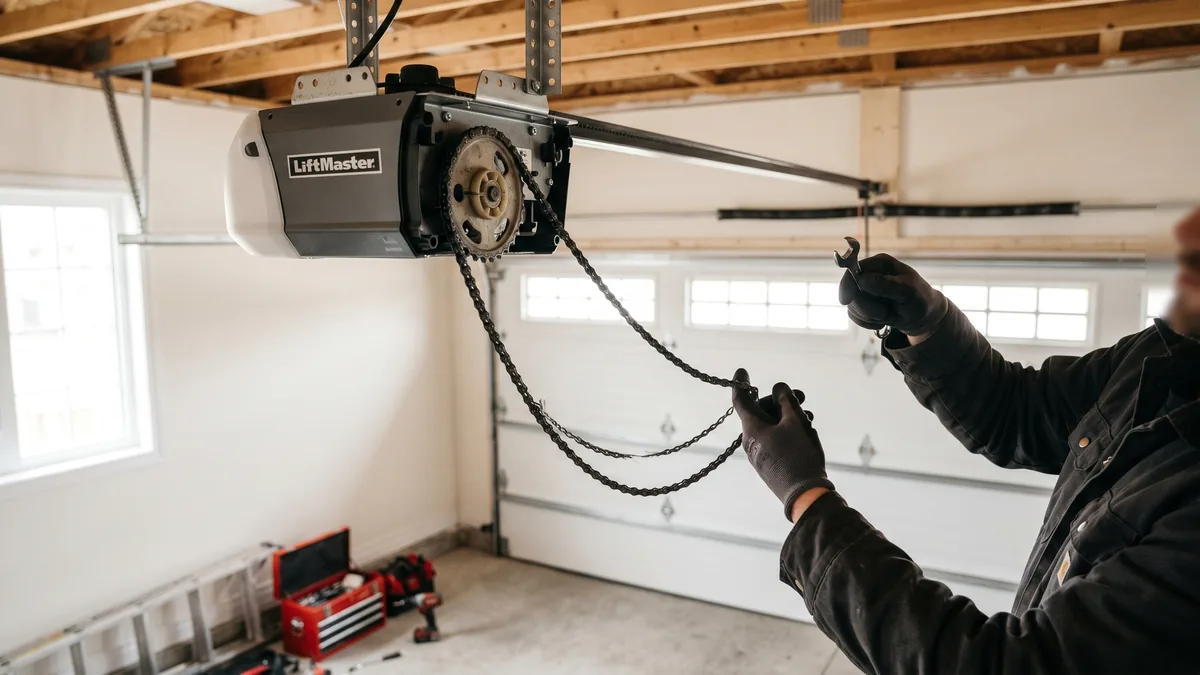
A garage door opener chain comes off the sprocket almost always because the chain is too loose. As the chain stretches and the tension nuts back off, the slack chain whips and skips over the sprocket teeth until it jumps the rail. You can usually fix it yourself: unplug the opener, pull the red release cord, loosen the chain nuts, lift the chain back over the sprocket, then re-tension it to about a quarter-inch of sag. If it keeps coming off, the sprocket or drive gear is worn and needs a technician.
What Is the Sprocket on a Chain-Drive Opener?
The drive sprocket is the toothed wheel at the motor head of a chain-drive garage door opener. The motor turns this sprocket, the sprocket pulls the loop of metal chain along the T-rail, and the chain drags the trolley that opens and closes your door. When the chain loses tension or the sprocket teeth wear down, the links no longer mesh cleanly — the chain rides up over the teeth and "throws," landing alongside the rail or on the garage floor.
A chain dangling off the rail is one of the more alarming things a homeowner can walk into — and across Toronto and the GTA it is one of the more common opener service calls I run. The good news is that re-seating a thrown chain is usually a 30-minute job you can do yourself, because unlike the springs the chain holds no dangerous stored energy. The trick is knowing whether the chain simply slipped, or whether a worn sprocket or stripped gear is the real culprit. Here is how to tell them apart and put it right.
Why a Garage Door Opener Chain Comes Off the Sprocket
A healthy chain rides snugly in the sprocket teeth and never wanders. When a chain throws off, something has changed the geometry or the load. These are the causes I diagnose most often, ranked roughly from most to least common.
1. The Chain Is Too Loose (Stretched or Out of Adjustment)
This is the cause in the large majority of cases. Steel chain stretches a little over years of use, and the adjustment nuts on the trolley gradually vibrate loose. A slack chain sags, then begins to whip and slap the rail as the door reverses direction. Eventually a whipping link rides up over a sprocket tooth and the chain jumps clear of the rail. Re-tensioning the chain fixes this and, if the sprocket is still good, keeps it fixed.
2. A Worn or Chipped Drive Sprocket
The sprocket teeth wear into hooks over many thousands of cycles, especially if the chain has run loose for a while. Worn teeth no longer hold each link, so the chain skips even when tension looks correct. If you re-tension the chain and it still throws within a few cycles, suspect the sprocket. Most openers use a combined gear-and-sprocket kit that a technician swaps in.
3. A Stripped Plastic Drive Gear
Inside the motor head, a plastic main drive gear meshes with the motor worm gear and turns the sprocket. When that gear strips, the motor spins but the sprocket no longer drives the chain cleanly — you may hear the motor run while the door barely moves, and the loose-driving chain can derail. This is a classic companion failure: the same overload that throws a chain often chews the gear. Our garage door opener repair page covers gear-and-sprocket rebuilds.
4. A Binding or Unbalanced Door Overloading the Chain
The chain only pulls the trolley; the springs are supposed to carry the door’s weight. If a spring is weak or a door is binding in bent tracks, the opener and chain are forced to drag far more load than they were designed for. That extra strain stretches the chain, hammers the sprocket, and accelerates a derail. A door that feels heavy when lifted by hand points here — see broken garage door spring signs.
5. A Bent, Twisted, or Misaligned T-Rail
If the rail (the long track the trolley travels on) is bent or the chain has twisted along it, the chain’s path no longer lines up with the sprocket. The chain pulls at an angle and rides off the teeth. This often happens after the door is forced, hit, or after a previous DIY repair where the chain was reinstalled with a half-twist.
How to Put the Chain Back on the Sprocket (Step by Step)
Re-seating a thrown chain is genuinely homeowner-friendly because the chain carries no spring tension. You will need a stepladder, work gloves, and an adjustable or socket wrench. Set aside about 30 minutes.
- Cut the power. Unplug the opener or switch off its breaker. You do not want the trolley moving while your hands are near the chain and sprocket.
- Disconnect the door. Pull the red emergency release cord so the door detaches from the trolley and the chain is under no load.
- Loosen the chain tension. Find the two adjustment nuts on the threaded shaft near the trolley and back them off until the chain has plenty of slack to work with.
- Re-seat the chain on the sprocket. At the motor head, lift the chain back over the drive sprocket so each link sits in a tooth. Run your hand along the rail to confirm the chain is not twisted anywhere — a half-twist will throw it off again.
- Re-tension the chain. Tighten the adjustment nuts until the chain sags only about a quarter-inch (6 mm) above the base of the rail at its midpoint. Snug, not banjo-tight.
- Restore power and test. Reconnect the door to the trolley, plug the opener back in, and run a full open-and-close cycle. Watch that the chain stays seated and does not slap the rail.
How Tight Should the Chain Be?
Tension is the whole game here. Too loose and the chain whips and jumps the sprocket; too tight and it grinds the sprocket, gear, and bearings, runs loud, and wears out early. The manufacturer target on most LiftMaster, Chamberlain, and Genie chain drives is the same: about a quarter-inch of sag at the rail midpoint, adjustable down with light finger pressure. You can confirm the exact figure in your model’s manual via the LiftMaster owner’s manual library.
Re-Seat, Re-Tension, or Replace? A Quick Diagnosis Table
The symptom you see when the chain throws off tells you which repair you actually need. Use this table to match what your opener is doing to the likely fix and whether it is safe to handle yourself.
| What You See / Hear | Likely Cause | Fix | Safe to DIY? |
|---|---|---|---|
| Chain off rail, slaps when running, sprocket teeth look fine | Loose / stretched chain | Re-seat & re-tension | Yes |
| Chain throws off again right after re-tensioning | Worn / hooked sprocket teeth | Gear-and-sprocket kit | Caution |
| Motor runs but door barely moves; grinding | Stripped plastic drive gear | Replace drive gear | No |
| Door feels heavy by hand; chain strains | Weak spring / unbalanced door | Spring service | No |
| Chain rides off at an angle; rail looks bent | Bent or twisted T-rail | Realign / replace rail | Caution |
| Opener 12–15+ yrs, repeated throws | End-of-life unit | Replace opener | Pro install |
Chain Drive vs. Belt Drive: Will It Happen Again?
Once a chain has thrown off, a lot of GTA homeowners ask whether it is time to switch to a belt-drive opener. Both are solid choices — Royal sells and installs LiftMaster, Chamberlain, and Genie in chain, belt, and direct-drive versions — so here is the honest comparison rather than a sales pitch.
| Feature | Chain Drive | Belt Drive |
|---|---|---|
| Up-front cost | Lower | Higher |
| Noise / vibration | Louder, metallic | Quieter, smoother |
| Can "throw off" the drive? | Yes (chain can derail) | Rare (belt rides a pulley) |
| Maintenance | Periodic re-tension & lube | Minimal |
| Best for | Detached / standalone garages | Bedrooms above the garage |
| Durability in cold | Excellent, very tolerant | Excellent |
For most detached GTA garages a well-maintained chain drive is reliable and the most affordable option. If your garage sits under a bedroom, a quieter belt is worth the upgrade. Whatever you choose, the Door & Access Systems Manufacturers Association sets the safety standards both must meet — you can read more at DASMA. Compare brands first in our Genie vs. Chamberlain guide.
What It Costs to Fix a Thrown Chain in the GTA
If all your chain needs is re-seating and re-tensioning, that is usually folded into a routine maintenance tune-up — lubrication, balance check, sensor alignment, and hardware tightening — which runs $120 + tax across Toronto and the GTA. If the diagnosis turns up a worn sprocket, stripped gear, or a deeper problem, here is what the related repairs typically cost:
| Service | Typical Cost (CAD) |
|---|---|
| Maintenance & tune-up (re-tension included) | $120 + tax |
| Cables & brackets repair | $180–$260 + tax |
| Single torsion spring (if door overloaded chain) | from $280 + tax |
| New opener / motor (incl. install & programming) | from $600 + tax |
Royal Garage Doors includes a FREE service call with any repair, so diagnosis costs nothing if you proceed; a $120 diagnostic applies only if you decide not to go ahead after the assessment. New openers carry our 1-year labour and 5-year hardware warranty. For the full list, see our pricing page, the opener installation cost breakdown, or read verified customer reviews.
When Replacement Beats Repair
If your chain-drive opener is under about 10 years old and only needs a re-tension or a sprocket kit, repair is the clear winner. Once a unit is 12–15 years or older and the chain keeps throwing because the gear and sprocket are worn — or it lacks modern rolling-code security and battery backup — a new chain-drive opener from $600 installed, or belt-drive DC from $630, is often cheaper than chasing repeated repairs. We install LiftMaster, Chamberlain, and Genie openers and service all major brands.
Chain Keeps Coming Off the Sprocket?
A chain that throws off again after re-tensioning means a worn sprocket, stripped gear, or an unbalanced door — jobs best left to a pro. Royal Garage Doors offers FREE service calls with any repair across Toronto & the GTA, with same-day appointments available.
Call 437-265-9995