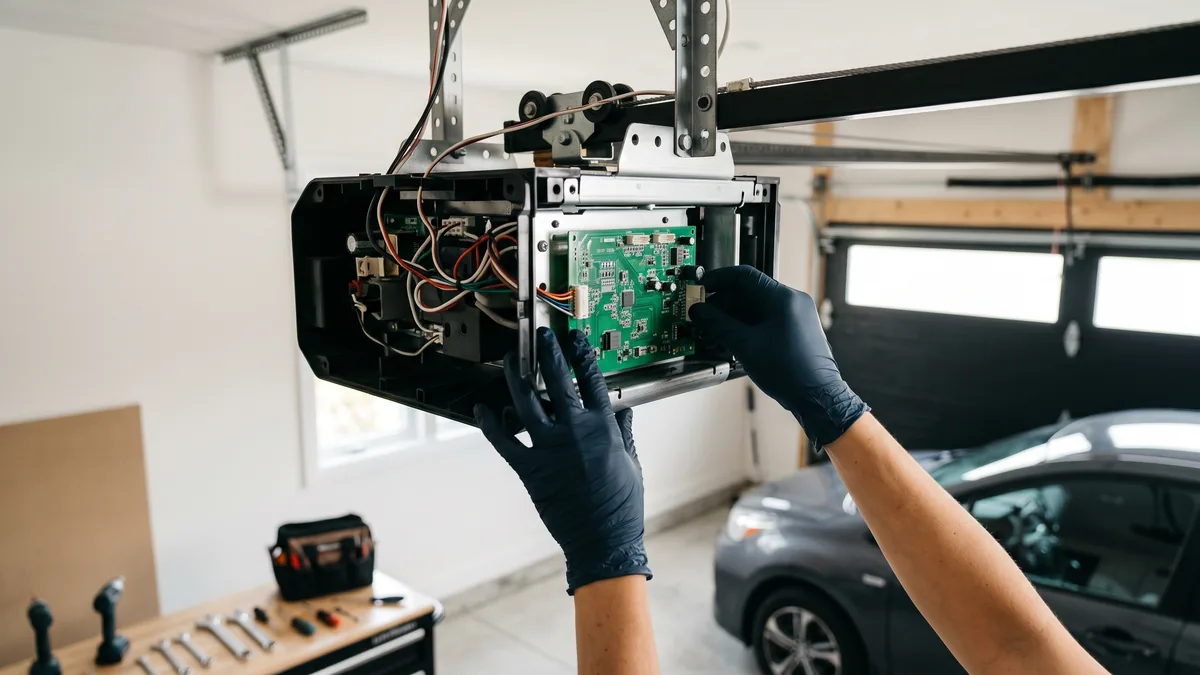
The logic board is the circuit board that controls a garage door opener — it reads the wall button, remotes, and safety sensors and tells the motor when to run. Replace it when the opener has power but won’t respond, behaves erratically, or the board looks scorched. A genuine board may cost $60–$180 for the part alone; Royal Garage Doors charges $250 for logic board replacement. New openers supplied and installed start at $600 for chain drive and $630 for belt-drive DC.
What Is a Garage Door Opener Logic Board?
The logic board (also called the circuit board, control board, or motherboard) is the green printed-circuit board inside the opener’s motor head. It is the brain of the system: it receives signals from the wall control, RF remotes, and keypad, monitors the photo-eye safety sensors, drives the motor and lights, and stores your travel limits and force settings. When this board fails — from a power surge, moisture, heat, or simple age — the opener can lose power, ignore commands, or act unpredictably even though the motor and gears are fine.
A garage door opener that lights up but refuses to move is one of the more frustrating faults we see across Toronto and the GTA — and the logic board is a frequent, but often misdiagnosed, cause. Before you spend on a board you may not need, this guide walks through the real failure symptoms, how to test the board against the cheaper culprits, the repair-versus-replace math, and a safe step-by-step swap. As an IDEA Certified technician with 15+ years in GTA garages, here is exactly how I approach it.
Signs Your Opener Logic Board Is Failing
A bad logic board rarely announces itself cleanly. The tell-tale pattern is an opener that clearly has electrical power — the courtesy light works, the LED glows — yet the door will not respond normally. Watch for these symptoms:
- Power but no response. The opener light works, but pressing the wall button or remote does nothing — no motor hum, no click.
- Erratic behaviour. The door opens or closes on its own, stops partway, reverses for no reason, or ignores its travel limits.
- Remotes and keypad won’t learn. The board refuses to enter or hold its programming, so new remotes won’t pair.
- Unusual diagnostic flashes. LiftMaster, Chamberlain, and Genie openers blink coded patterns; a code that points past the sensors and motor often means the board.
- Visible damage. Scorch marks, a burnt-electronics smell, bulged capacitors, or corrosion on the board confirm it.
- Intermittent power surges. The unit resets randomly or the light flickers, common after a GTA summer thunderstorm or winter brownout.
If your fault is broader than the board — a dead motor, a grinding gear, or no power at all — start with our garage door opener repair service instead, which covers the full diagnosis.
How to Test the Board Before You Replace It
The logic board is often blamed for problems that are actually cheaper, easier fixes. Rule these out first — in this order — before buying a board:
- Check the safety sensors. The photo-eyes near the floor must both show a steady (not blinking) LED. A misaligned or dirty sensor stops the door from closing and mimics a board fault. Sensor repair runs $120–$180 + tax.
- Test the wall control. A failed wired wall button or a shorted bell wire can deaden the opener. Briefly touch the two wall-button terminals on the opener together; if the motor runs, the board is fine and the wall control is the problem.
- Try a remote and the keypad. If the wall button is dead but a remote works, the issue is the wall control or its wiring, not the board.
- Confirm power at the outlet. Plug a lamp into the ceiling outlet. No power means a tripped GFCI or breaker, not a board.
- Listen to the motor. A motor that hums but won’t turn usually means a stripped drive gear or a failed capacitor — not the logic board. Total silence with a healthy light points back to the board.
- Inspect the board visually. Remove the light lens and look for burns, corrosion, or swollen capacitors.
Logic Board Replacement Cost vs. a New Opener
Here is where most GTA homeowners make their decision. A replacement logic board is a relatively inexpensive part, but it goes into a unit that may already be near the end of its life. Compare the realistic numbers:
| Option | Typical Cost (CAD) | Best When |
|---|---|---|
| Logic board (part only) | $60–$180 | DIY, opener under ~8 yrs old |
| Board supplied & installed | $250 | You want it done and programmed right |
| Safety sensor repair | $120–$180 + tax | The real fault was the photo-eyes |
| New opener supplied & installed | from $600 + tax | Unit 10+ yrs, parts discontinued, worn gears |
The math is simple: if the rest of the opener is old or worn, compare the $250 logic board replacement with a new unit and fresh warranty. A new opener from us starts from $600 + tax for chain drive, with belt-drive DC from $630, smart/myQ from $760, and side-mount from $900 with Wi-Fi included, including the opener, installation, and programming. See current numbers on our opener installation cost guide and the full pricing page.
How to Replace a Garage Door Opener Logic Board (Step by Step)
Good news for the DIY-minded: unlike spring and cable work, a logic board swap involves no high-tension components — it is purely electronic. The job takes most homeowners 30–45 minutes. You will need a nut driver or socket set, a Phillips screwdriver, a step ladder, and a board matched exactly to your opener’s model number.
- Cut the power. Unplug the opener or switch off its breaker. Pull the red manual-release cord so the door is disconnected from the trolley and can’t move.
- Photograph the wiring. Take clear, well-lit photos of every wire and connector on the existing board before you touch anything. This is your map for reassembly.
- Open the motor head. Remove the light lens and bulbs, then the screws holding the logic board cover. Gently unplug each connector, the antenna lead, and the motor leads from the old board.
- Fit the new board. Seat the matched replacement board on the same standoffs and reconnect every connector to the identical terminals shown in your photos. Do not force a connector — they are keyed.
- Restore power and reprogram. Plug the opener back in. Re-learn the wall control, every remote, and the keypad, then re-set the open and close travel limits and the force settings per your owner’s manual.
- Re-engage and test safety. Reconnect the trolley, then run a full cycle. Critically, test the auto-reverse: lay a 1.5-inch board flat under the door — it must reverse on contact — and wave an object through the photo-eyes to confirm they stop the door.
For brand-specific programming steps, see our guides on Chamberlain opener programming and LiftMaster myQ setup. For brand-specific repair, we service LiftMaster, Chamberlain, Genie, and Wayne Dalton openers.
How to Protect Your New Logic Board
A logic board should last 10–15 years. When one dies early, the cause is almost always preventable. Protect your investment — old board or new:
- Use a surge protector. Plug the opener into a quality surge-protected outlet; GTA summer storms and grid spikes are the number-one board killer.
- Keep moisture away. Fix roof leaks and address a worn top and side seal so wind-driven rain and snow don’t reach the motor head.
- Don’t overwork the opener. A heavy, unbalanced door forces the motor and electronics to strain. An annual tune-up ($120 + tax) keeps the door balanced so the board isn’t fighting it.
- Clean the sensors. Wipe the photo-eyes and check their alignment a couple of times a year to avoid false faults.
- Replace, don’t patch, an obsolete opener. If parts for your model are discontinued, a modern opener or door upgrade ends the cycle of repairs.
Where Royal Garage Doors Fits In
We service openers and replace boards across Toronto, Mississauga, Brampton, Toronto, and Hamilton. Our technicians carry common LiftMaster, Chamberlain, and Genie boards and can program travel limits and remotes on the spot. Logic board replacement is $250. Every repair includes a FREE service call — a $120 diagnostic applies only if you choose not to proceed. New chain-drive opener installs start from $600 + tax with a 1-year labour and 5-year hardware warranty. Read what GTA homeowners say on our reviews page, or learn more about our company.
Opener Lit Up But Won’t Move?
Don’t guess and buy the wrong part. Royal Garage Doors diagnoses logic board, sensor, and motor faults across Toronto & the GTA — FREE service call with any repair, same-day appointments available.
Call 437-265-9995