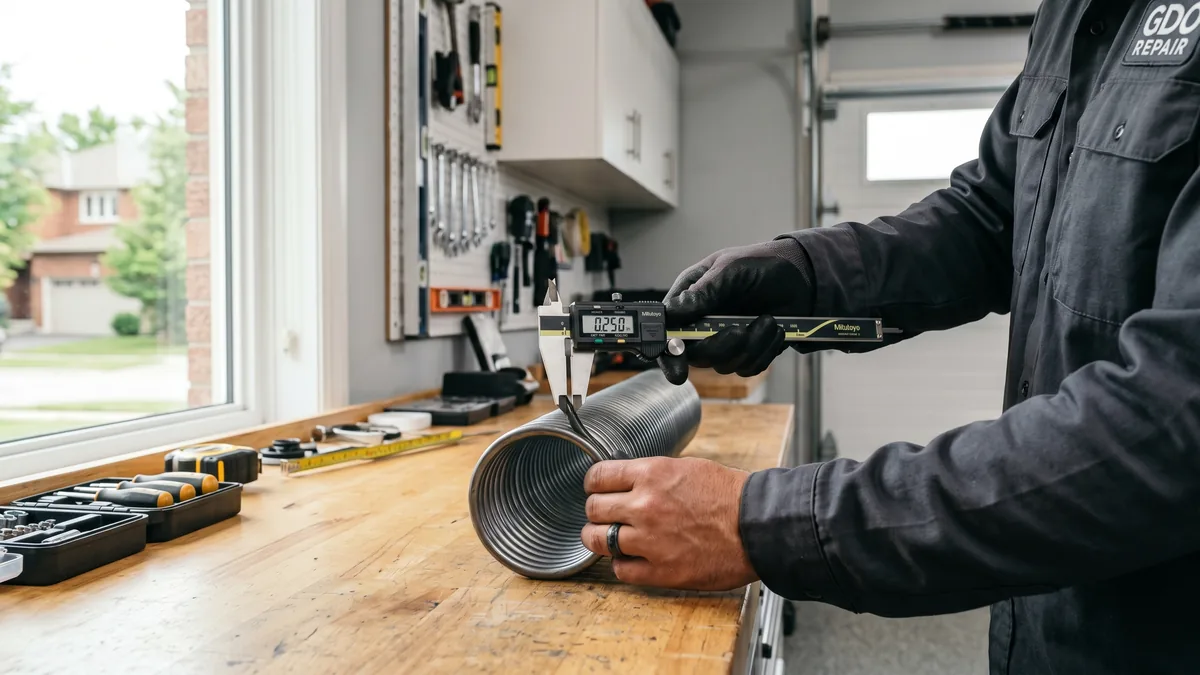
To measure a garage door torsion spring you need four specs: wire size, inside diameter, overall length, and wind direction. Find the wire size by measuring 20 coils and dividing by 20; read the inside diameter off the winding cone (commonly 1-3/4″, 2″, or 2-1/4″); measure the relaxed coil length end to end; and check wind direction at the winding cone. All four must match the replacement spring. Measuring is safe, but a wound torsion spring stores enough energy to be deadly — leave the actual replacement to a technician.
What Is a Garage Door Torsion Spring?
A torsion spring is the tightly wound steel coil mounted on a shaft above the garage door opening. It stores mechanical energy as it winds and unwinds, counterbalancing the door’s weight so a person — or a small opener motor — can lift a 150 to 300 lb door with ease. Because it carries the entire weight of the door under high tension, its exact size dictates how well the door balances, and the wrong spring will leave the door dangerously heavy or hard to keep down.
Ordering a replacement torsion spring sounds simple until you realize a tiny difference in wire thickness can change the spring’s strength by 30% or more. Across Toronto and the GTA I see homeowners buy the wrong spring every week — usually because they guessed at the wire size or ignored wind direction. This guide walks you through the four measurements that matter, how to read them off a broken spring, and how to use the cone color codes so you order the right part the first time.
The 4 Measurements You Need
Every torsion spring is defined by four numbers. Get all four right and any supplier can match the spring exactly; get even one wrong and the door will be over-sprung (flies up and won’t stay down) or under-sprung (feels heavy and burns out the opener). Here is what each measurement is and why it matters.
| Measurement | What It Is | Typical Residential Range |
|---|---|---|
| Wire size | Diameter of the spring wire itself | 0.187″ – 0.250″ |
| Inside diameter (ID) | Inner bore of the coil | 1-3/4″, 2″, 2-1/4″ |
| Overall length | Relaxed coil length, cone to cone excluded | 14″ – 38″ |
| Wind direction | Left-wound or right-wound | One of each on two-spring doors |
Step 1: Measure the Wire Size
Wire size is the diameter of the steel wire the spring is coiled from, and it is the single most important number because it has the biggest effect on spring strength. The difference between a 0.207″ and a 0.218″ wire looks tiny but changes the lift dramatically, so you cannot eyeball it — you measure it.
The 20-Coil Method
The most accurate way to find wire size without a caliper is to measure multiple coils and average:
- Press the coils tight. On a relaxed (unwound) or broken spring, push the coils together so there are no gaps.
- Measure 10 coils. Lay a tape measure along the spring and record the length of exactly 10 coils. Divide by 10.
- Measure 20 coils. Now measure 20 coils and divide by 20. Averaging the two numbers cancels out small errors.
- Match to a chart. Compare your result to a standard wire-size chart to land on the exact spec.
For example, if 20 coils measure 4-3/8 inches, that is 4.375 ÷ 20 = 0.2188″, which rounds to the industry-standard 0.218″ wire. A caliper across a single wire confirms it, but the coil-count method is reliable enough that most pros trust it on its own.
| 20-Coil Length | Wire Size | Common Cone Color |
|---|---|---|
| 4-3/16″ | 0.207″ | Blue |
| 4-3/8″ | 0.218″ | Red |
| 4-9/16″ | 0.225″ | Yellow |
| 4-3/4″ | 0.234″ | Green |
| 5″ | 0.250″ | Gold |
Color codes vary slightly by manufacturer, so treat the colors as confirmation, not proof. For a deeper breakdown of every code see our guide to garage door spring color codes.
Step 2: Measure the Inside Diameter
The inside diameter (ID) is the bore of the coil — the hole the torsion shaft passes through. Residential springs are almost always 1-3/4″, 2″, or 2-1/4″, with 2″ being by far the most common in the GTA. Getting this wrong means the winding and stationary cones won’t fit the spring at all.
Two Ways to Find the ID
- Read the cone. The winding cone (the cast aluminum or steel cone with set screws) is usually stamped with the ID — for example “P200” or “200” for a 2″ spring. This is the fastest and most reliable method.
- Measure the bore. If the cone is unmarked, measure straight across the inside of the coil opening with a ruler or caliper. Measure the gap, not the outside of the wire.
Step 3: Measure the Overall Length
Length is the relaxed, coils-tight measurement of the spring body only — do not include the winding cone or the stationary (red) cone in this number. Length, combined with wire size and ID, determines how much lift the spring provides. A spring that is too short under-lifts; too long over-lifts.
- Compress the coils. Push all the coils tightly together with no gaps.
- Measure the steel coil only. Run the tape from the start of the coils to the end of the coils, stopping where the cones begin.
- For a broken spring, add the pieces. If the spring snapped, measure both broken segments (coils tight) and add them together for the original length. This is the most common scenario we see.
Because measuring a broken, tensioned, or rusted spring accurately is fiddly, this is the number homeowners most often get wrong. If you’re unsure, our technicians measure it for free during a tune-up or repair visit.
Step 4: Determine the Wind Direction
Wind direction tells you whether a spring is left-wound or right-wound. On a single-spring door it must match the original; on a standard two-spring setup you have one of each, and they are not interchangeable. The cone colors make this easy: the red cone is almost always the left-wound spring and the black cone the right-wound spring, but always verify by looking at the wire.
How to Read It Off the Wire
Look at the end of the spring nearest the winding cone (the stationary end, by the center bracket):
- Left-wound: the end of the wire points up and to the right. This spring typically mounts on the right-hand side of the door as you face it from inside.
- Right-wound: the end of the wire points up and to the left. This spring typically mounts on the left-hand side.
An easy memory trick: with the spring in front of you, follow the very last coil with your finger. If the wire spirals away clockwise, it’s one direction; counter-clockwise, the other. When in doubt on a two-spring door, just note which side each cone color sits on and replace like-for-like.
How to Measure a Broken Spring
A snapped spring is actually easier to measure safely because the tension is gone — that’s exactly why it broke. Here’s how to capture all four specs from a spring that has already failed:
- Wire size: use the 20-coil method on the longer broken segment; even a partial spring gives you plenty of coils.
- Inside diameter: read it off the winding cone stamp, which survives the break intact.
- Length: push the coils of both broken pieces tight, measure each, and add them together.
- Wind direction: determine it from the cone color and the wire end, exactly as on an intact spring.
If you’re not confident in any number, snap a clear photo of the spring next to a tape measure and of the cone stamp. Our team can often confirm the size from photos before we even arrive. Learn the warning signs that lead here in our overview of a broken garage door spring and the related cable problems that often follow.
Should You Replace It Yourself?
Measuring is the safe part. Replacing a torsion spring means winding a new spring under thousands of pounds of potential energy using two winding bars — one slip and the bar becomes a projectile. The U.S. Consumer Product Safety Commission and door manufacturers consistently warn that torsion spring replacement is among the most dangerous DIY home repairs. The Door & Access Systems Manufacturers Association (DASMA) publishes the spring and counterbalance standards the industry follows; you can review their technical resources at DASMA.com, and general safety guidance at the CPSC.
For most GTA homeowners, having a technician do it is faster, safer, and barely more expensive than buying the spring and tools yourself — especially once you factor in a wasted weekend if you order the wrong size.
What Spring Replacement Costs in the GTA
Here is current Royal Garage Doors pricing in Canadian dollars. We carry common spring sizes on the truck, so most jobs are completed same day:
| Service | Typical Cost (CAD) |
|---|---|
| Single torsion spring | $280 + tax |
| Double spring setup (both springs) | $320–$460 + tax |
| Per spring (commercial / multi-spring) | $160 / spring |
| Cables & brackets | $180–$260 + tax |
| TorqueMaster conversion to standard torsion | $530 + tax |
| Maintenance & tune-up | $120 + tax |
Every repair includes a FREE service call — the $120 diagnostic fee applies only if you choose not to proceed after assessment. Springs come with our 3-tier warranty: 1-year labour, 5-year hardware. For the full breakdown see our spring replacement cost guide and the live pricing page. You can also read verified customer reviews before you book.
Got Your Four Measurements? We’ll Take It From Here.
Skip the guesswork and the wasted weekend. Royal Garage Doors carries the right spring sizes on every truck and replaces them safely with a FREE service call across Toronto & the GTA — same-day appointments available.
Call 437-265-9995If your spring failure also damaged other parts, our technicians can handle a roller replacement, a broken cable, or a panel replacement in the same visit. Need a whole new door instead? Explore garage door replacement or browse our overhead garage doors. We serve Mississauga, Toronto, Brampton, and Hamilton.