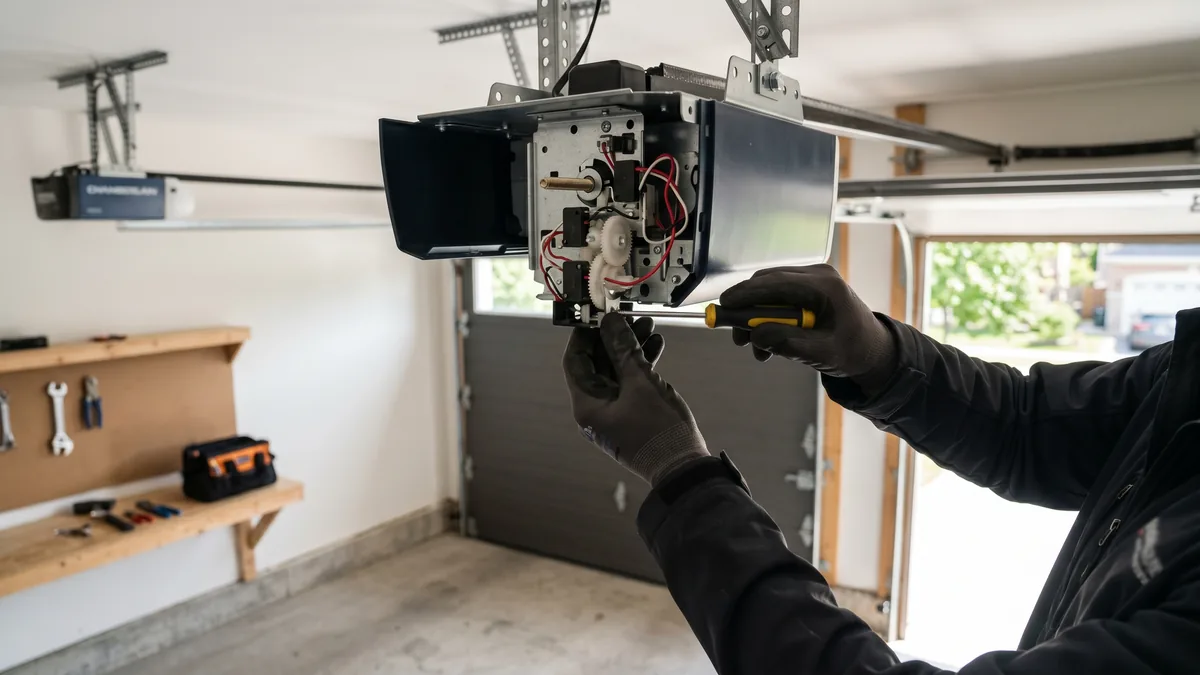
A garage door opener limit switch tells the opener where to stop when the door reaches the fully open or fully closed position. When it fails or drifts out of adjustment, the door stops short of the floor, reverses just before closing, will not open all the way, or the motor keeps running after the door stops. Most cases are fixed by cleaning the photo-eye sensors, then re-setting the up/down limits on the motor head — one turn of a screw-type limit equals roughly 2 inches of door travel. A switch or logic board that has actually failed needs replacement by a technician.
What Is a Garage Door Opener Limit Switch?
A limit switch is the part of your opener that defines the exact stopping points of door travel — the up limit (fully open) and the down limit (fully closed). On older chain and screw-drive openers it is a mechanical contact tripped by a traveling nut on a threaded shaft. On modern openers it is an electronic encoder or optical sensor inside the motor head that counts motor revolutions. Either way, if the limit is wrong or the switch has failed, the opener loses track of where “all the way down” and “all the way up” actually are.
A garage door that stops a few inches above the floor, bounces back open at the last second, or leaves the motor humming after it parks is almost always a limit switch problem — not a dead opener. Across Toronto and the GTA this is one of the most frequent service calls we get, and many homeowners can correct it in 15 minutes once they know which control to touch. Here is exactly how to diagnose and fix it.
Symptoms of a Bad or Misadjusted Limit Switch
Limit switch faults show up at the very top or very bottom of door travel. If your door behaves normally through the middle of its run and only misbehaves at the ends, the limit system is the first suspect. Watch for these signs:
- Door stops short of the floor: The door parks a few inches above the threshold, leaving a gap. The down limit is stopping it too early.
- Door reverses right before closing: The door reaches the floor (or nearly), then immediately rolls back up. The down limit is set too far, so the door hits the floor and the opener reads the rebound as an obstruction.
- Door will not open fully: The door stops part-way up, reducing vehicle clearance. The up limit is set too low.
- Motor keeps running after the door stops: The door reaches the end of travel but the motor keeps humming or grinding for several seconds. The limit switch is not signaling the opener to cut power.
- Erratic stopping points: The door stops in a slightly different place every cycle. This points to a worn travel nut, a slipping limit gear, or a failing optical encoder rather than simple misadjustment.
Rule Out Sensors and Springs First
Before you adjust anything, confirm the problem is actually the limit switch. Two other faults mimic limit problems almost perfectly, and adjusting the limits will not fix them.
1. Check the photo-eye safety sensors
If your door reverses before it closes, misaligned or dirty safety sensors are the single most common cause — not the limit. The two photo eyes mounted near the bottom of the tracks must point straight at each other. Wipe both lenses with a soft cloth and confirm both indicator lights glow solid. A blinking or dark sensor light means the beam is broken, and the opener will refuse to close (or will reverse) no matter how the limit is set. Our guide on what the green and red sensor lights mean walks through the indicator codes.
2. Confirm the springs are doing their job
The opener’s limit and force systems assume the springs are counterbalancing the door weight. If the door is heavy to lift by hand, jerks, or slams, you likely have a spring problem, and adjusting limits will only mask it. Pull the red emergency release cord, lift the door to waist height by hand, and let go: a balanced door stays put. If it crashes down or flies up, stop and book opener and spring service before touching any limit setting.
How Limit Switches Work: Mechanical vs Electronic
Knowing which type you have determines how you fix it. There are two broad designs, and many GTA garages still run older units that use the mechanical style.
| Feature | Mechanical Limit Switch | Electronic / Optical Limit |
|---|---|---|
| Found on | Older chain & screw-drive openers | Most openers made after ~2010, all myQ models |
| How it senses position | Traveling nut trips a physical switch or cam | Encoder/optical sensor counts motor turns |
| How you adjust it | Turn UP/DOWN limit screws or move switch cams | Run a program/learn cycle with the buttons |
| Common failure | Stripped travel nut, worn contacts, bent rod | Dirty encoder, failed sensor, logic board fault |
| 1 turn / 1 step equals | ~2 inches of door travel | Re-learned automatically on cycle |
Mechanical limits drift over time as the door, rollers, and roller hardware wear, which slowly changes where the door physically sits. Electronic limits rarely drift but can lose their settings after a power surge, a battery-backup swap, or a logic board glitch — in which case you simply re-run the learn cycle.
How to Adjust the Limit Switch Step by Step
Once you have ruled out sensors and springs, adjusting the limit is straightforward. Work in small increments and test after every change.
Screw-type (mechanical) openers
- Find the two limit-adjustment screws on the back or side of the motor head, usually labeled UP (or OPEN) and DOWN (or CLOSE).
- Door stops short of the floor: turn the DOWN screw clockwise, about 1 turn (roughly 2 inches of extra travel). Run the door and re-check.
- Door reverses at the floor: turn the DOWN screw counterclockwise a half turn so the door stops gently without rebounding.
- Door will not open fully: turn the UP screw clockwise to add up travel; counterclockwise if it strains at the top.
- Test after each adjustment, standing clear of the door path. If the motor grinds or hums at the end of travel, you have gone too far — back off a half turn.
Electronic / myQ openers
- Press and hold the program or adjust button on the motor head until the indicator light blinks.
- Use the up/down or arrow buttons to drive the door to the exact fully open position, then confirm to set the up limit.
- Repeat for the fully closed position to set the down limit, stopping the door so it just touches the floor.
- Some models auto-learn: press LEARN, let the door run a full open-and-close cycle, and the opener sets both limits itself.
- Finish with the 2x4 reverse test described above to verify the new settings are safe.
Refer to your unit’s manual for the exact button sequence. LiftMaster and Chamberlain publish model-specific instructions in their official LiftMaster customer support library, and the safe-operation requirements for auto-reverse and travel limits come from the CSA Group standards adopted across Ontario.
When the Limit Switch Has Actually Failed
Adjustment fixes a limit that has drifted. But if you have re-set the limits and the door still stops in random places, the motor keeps running, or the opener ignores the limit entirely, the hardware itself has failed. The usual culprits are:
- Stripped or seized travel nut on a screw-drive opener — it no longer moves to trip the switch.
- Worn switch contacts or a bent actuating rod that no longer makes reliable contact.
- Dirty or failed optical encoder inside an electronic motor head, so the opener miscounts revolutions.
- Faulty logic board — often after a power surge — which controls the electronic limits.
On many openers the limit assembly or logic board can be repaired for far less than a full replacement. When the unit is more than 12–15 years old, however, replacing the whole opener is usually the better value: a new chain-drive LiftMaster, Chamberlain, or Genie opener installed starts from $600 + tax, while belt-drive DC starts at $630, including programming and a fresh warranty. See our full pricing and the opener installation cost guide to compare. If the door is also old or damaged, a combined door and opener replacement may make more sense than separate fixes.
Door Stopping Short or Reversing in the GTA?
If cleaning the sensors and adjusting the limits did not solve it, the limit switch or logic board may have failed. Royal Garage Doors diagnoses opener limit problems across Toronto & the GTA with a FREE service call when you proceed with the repair.
Call 437-265-9995Key Takeaways
- Limit switch problems only affect the ends of door travel — stopping short, reversing, not opening fully, or the motor running on.
- Always clean and align the photo-eye sensors first; misaligned sensors mimic a bad down limit.
- Never adjust limits on an unbalanced or broken-spring door — fix the spring first.
- On screw-type openers, one turn of the limit screw equals about 2 inches of travel; on electronic openers, re-run the learn cycle.
- Random stopping or a motor that keeps running means the switch or logic board has failed and needs a technician.
- A new opener installed in the GTA starts from $600 + tax; Royal Garage Doors offers a FREE service call with any repair.