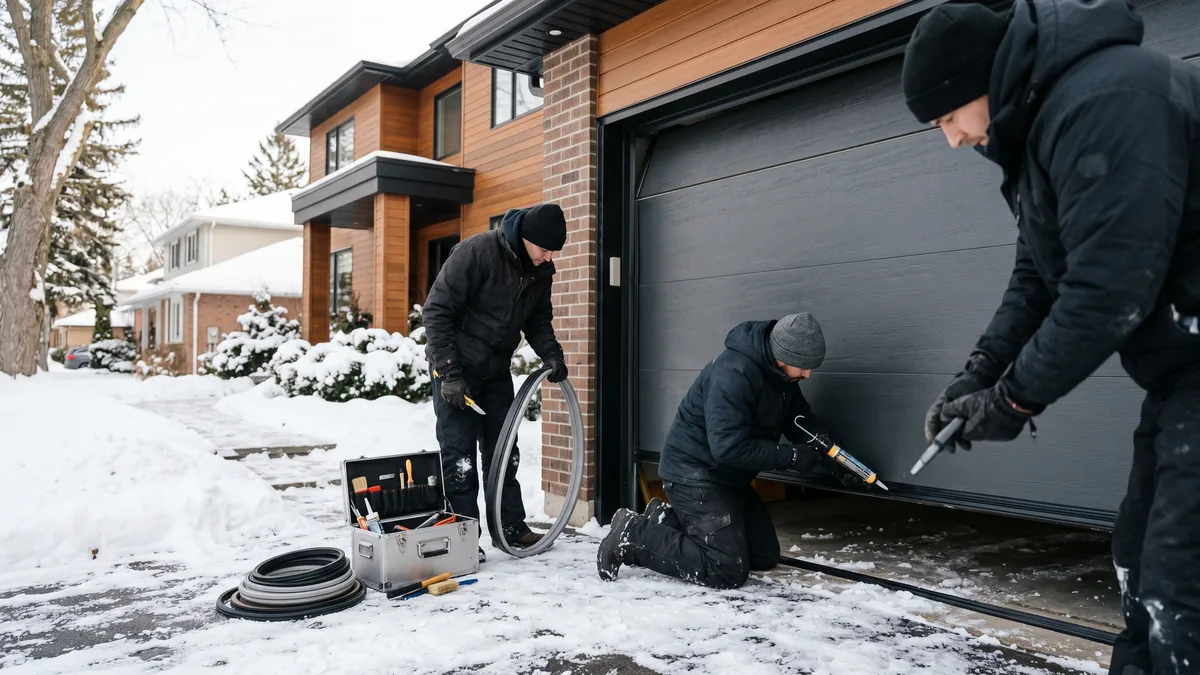
To winterize a detached garage in Canada, seal the garage door with fresh bottom, side, and top weather seals, then insulate the door, walls, and ceiling and air-seal every gap with caulk and spray foam. Service the door with a cold-rated silicone lubricant so it does not freeze or bind, keep the threshold clear of ice, and protect any water lines. Most GTA garages do not need a heater — sealing and insulating alone keep them well above outdoor temperatures and protect the door, your vehicle, and stored items all winter.
What Does "Winterizing a Garage" Mean?
Winterizing a detached garage means preparing the building envelope and the garage door so the space stays dry, draft-free, and several degrees warmer than outside through a Canadian winter. It is a combination of weather sealing, insulation, air-sealing, door maintenance, and freeze prevention — not just turning on a heater. Done right, it protects the structure from freeze-thaw damage, keeps the door working in deep cold, and stops snow, ice, and meltwater from getting inside.
Every fall I get a wave of calls from homeowners across Toronto and the GTA whose detached garage door froze to the slab, jammed in the cold, or let snow drift in under the bottom edge. A detached garage takes the full brunt of an Ontario winter — no shared house wall, no spillover heat — so winterizing it properly matters more than for an attached one. Here is the exact step-by-step process I walk customers through, from sealing the door to protecting pipes, with real GTA pricing along the way.
Why Winterizing a Detached Garage Matters
A detached garage is exposed on all four sides, so it loses heat fast and is the first part of your property to feel an Arctic front. Left unprepared, three things tend to go wrong every winter:
- The door freezes shut or strains the opener. Meltwater pools at the threshold, freezes overnight, and bonds the rubber seal to the concrete. Force it open with the opener and you can snap a spring or strip the drive gear.
- Cold and snow get inside. A cracked bottom seal or gappy jamb lets drifting snow, wind, and meltwater in, which then refreezes on the floor and damages stored items and vehicle finishes.
- Freeze-thaw damages the structure. Moisture that gets into an unsealed garage swings above and below freezing repeatedly, which is hard on concrete, drywall, and anything wood.
Good news: the highest-impact fixes are also the cheapest. The garage door is responsible for most of the heat loss and almost all of the cold-weather headaches, so that is where winterizing should start.
The 7-Step Plan to Winterize a Detached Garage
Work through these in order. The first three steps seal and insulate the envelope, the next two protect the door and water lines, and the last two cover heating and freeze-up prevention. You can do most of it in an afternoon.
1. Replace Worn Weather Seals on the Door
This is the single most cost-effective winterizing step. The garage door has three seal locations: the bottom seal (a flexible rubber or thermoplastic strip in the bottom retainer), the side and top seals on the jambs, and optionally a threshold seal glued to the floor. In deep cold, cheap PVC seals harden and crack, so choose a cold-rated rubber or TPE material that stays flexible. A good bottom seal conforms to uneven concrete and is your main defence against drifting snow and meltwater. Royal Garage Doors installs weather sealing and replacement door parts for $120–$260 + tax depending on door size. For a deeper look at the options, see our guides to side and top seals and threshold vs. bottom seal.
2. Insulate the Door, Walls, and Ceiling
An uninsulated single-layer steel door is the biggest cold surface in the garage. You have two paths: add a DIY insulation kit (foam or polystyrene panels that clip into each door section) to your existing door, or upgrade to a factory-insulated door with a polyurethane core. The factory door wins on R-value, sealing, and quietness, but a kit is a budget-friendly start. While you are at it, insulate any exposed wall cavities and the ceiling, since heat rises and escapes through the roof. Our breakdown of garage door insulation cost and the energy savings of an insulated door can help you decide.
3. Air-Seal Every Gap
Insulation slows heat loss; air-sealing stops drafts. Walk the garage on a windy day and find the leaks: the service (man) door, window frames, the sill plate where the wall meets the slab, and any penetrations for wiring or vents. Use exterior-grade caulk for small gaps and low-expansion spray foam for larger ones. Add weatherstripping and a door sweep to the service door. A well air-sealed detached garage will sit 5 to 15 C warmer than outside with no heat source at all.
4. Service and Cold-Proof the Garage Door
Cold thickens old grease, stiffens seals, and makes worn springs lose lifting force — which is why so many doors open slowly or stall in January. Before winter, lubricate the rollers, hinges, springs, and bearing plates with a cold-rated silicone garage-door lubricant (never WD-40, which is a degreaser), then tighten all hinge and bracket hardware. If your door is more than a few years old, book a professional tune-up — a technician checks spring balance, cable condition, and sensor alignment, the parts you should not service yourself. A balanced, well-lubricated door glides in the cold instead of fighting it.
5. Protect Pipes and Water Lines
If your detached garage has a utility sink, hose bib, or any plumbing, an unheated space will freeze and burst those lines. Shut off and drain the supply for the season, blow out the lines, and add a non-toxic plumbing antifreeze to traps. Insulate any pipe that must stay charged with foam pipe sleeves, and consider thermostatic heat cable for vulnerable runs.
6. Add Safe Heat Only If You Need It
Most GTA detached garages are winterized to protect the structure and door, not to stay shirt-sleeve warm. If you use the space as a workshop, size a CSA-approved, thermostatically controlled heater to your insulated square footage. Electric radiant or fan heaters suit small sealed garages; gas units need proper venting and clearances. Per Natural Resources Canada, insulating and air-sealing first is far cheaper than oversizing a heater — see their home energy efficiency resources.
7. Prevent the Door From Freezing to the Slab
The classic winter failure is a door frozen to the concrete. Prevent it by clearing snow and ice from the threshold after every storm, keeping the bottom seal flexible, and eliminating standing water that pools and freezes under the door. A light wipe of silicone on the bottom seal helps it release instead of bonding to the slab. If the door does freeze, free the ice with warm water or a hair dryer first — never just hit the opener button.
Winterizing Cost & Priority Checklist
Here is how the tasks stack up by impact and typical GTA cost, so you can spend where it counts most. The door-focused items deliver the biggest comfort-per-dollar return.
| Task | Impact | DIY? | Typical GTA Cost |
|---|---|---|---|
| Replace bottom / side / top seals | Very High | Yes / Pro | $120–$260 + tax |
| Door tune-up & lubrication | High | Pro recommended | $120 + tax |
| DIY door insulation kit | High | Yes | $70–$200 |
| Air-seal gaps (caulk / foam) | High | Yes | $30–$80 |
| Wall / ceiling insulation | Medium | Yes / Pro | Varies by size |
| Pipe protection | Medium | Yes | $20–$60 |
| Replace with insulated door | Very High | Pro | from $1,350 + tax |
For full, current pricing on every service, see our garage door pricing page. If your single-layer door is old and rattly, upgrading to an insulated one (8x7 from $1,350 + tax, 16x7 double $2,300 + tax, window inserts +$125/section) solves sealing, insulation, and cold-weather operation in one move — see installation cost and best doors for cold climates.
Should You Upgrade the Door or Just Insulate It?
If your current door is sound, seals well, and only lacks insulation, a kit plus fresh weather seals is the smart, cheap choice. But if the door is single-layer, dented, drafty, or 15-plus years old, a factory-insulated steel door is the better long-term value: tighter sections, integrated seals, a higher R-value, and quieter, smoother cold-weather operation. We install and service every major brand — Clopay, Wayne Dalton, Garaga, Steelcraft, and more — so we can match the right insulated model to your garage and budget.
Common Winterizing Mistakes to Avoid
After 15 years of GTA winter calls, these are the errors I see most often — and they are easy to dodge.
- Heating before insulating. You will pay to warm the outdoors. Seal and insulate first, always.
- Forcing a frozen door with the opener. This is the fastest way to break a spring or strip the opener gear. Free the ice by hand first.
- Using WD-40 to lubricate. It is a degreaser that strips the protective film and attracts grit. Use a silicone or garage-door-specific lubricant.
- Buying cheap PVC seals. They harden and crack in deep cold. Choose cold-rated rubber or TPE that stays flexible at −20 C.
- Ignoring the threshold. Standing meltwater is what freezes the door to the slab. Keep it clear and graded so water drains away.
- Skipping the annual tune-up. Springs and cables fail in the cold; an autumn check-up catches them before they strand you in January.
What to Do If Your Door Already Froze or Failed
If your detached garage door is frozen shut, opening unevenly, or the opener struggles and reverses, do not keep cycling it. Free any ice at the threshold, then test the door by hand after pulling the red release cord. If it still binds, feels heavy, or the opener reverses, the issue is likely a spring, cable, or sensor problem that needs a technician. Our teams cover Toronto, Mississauga, Brampton, and Hamilton with same-day service, and we also handle opener repair and panel replacement.
Get Your Garage Door Winter-Ready
A pre-winter tune-up and fresh weather seals are the cheapest insurance against a frozen, jammed, or drafty door. Royal Garage Doors offers a FREE service call with any repair across Toronto & the GTA, with same-day appointments available.
Call 437-265-9995